Activator Client Portal
Intro
Activator Client Platform is an essential tool that allows various users, administrators, and managers to access and utilize our developed business and data processing modules. This platform provides a user-friendly and efficient interface to meet the operational needs of our users and maximize the effectiveness of their business processes.
To access this platform, you must first have a user account associated with an Activator tenant (client). If you do not have an account, please contact the tenant administrator to create one for you. For more information about accounts and security modules, click here.
Open https://v2_client_dev.asmlogic.com, you will be redirected to the login page (if you are not authenticated yet).
✋Caution
You can try this documentation with any environnement, but its recommended to use the dev environnement. View the complete list of URLs for all environments here.

- Change Language Dropdown: Use this dropdown to select the display language. Currently, English and French are supported, with English as the default language.
- Login Form: This is where users input their credentials: email and password.
- Login Button: Click this button after entering your credentials (email and password) to log in to the system.
- Password Reset Button: Use this button if you have forgotten your password and need to reset it. If you need more information about this functionality, click here
⛳Let's click on the login button and access the Activator homepage.
✍️NB
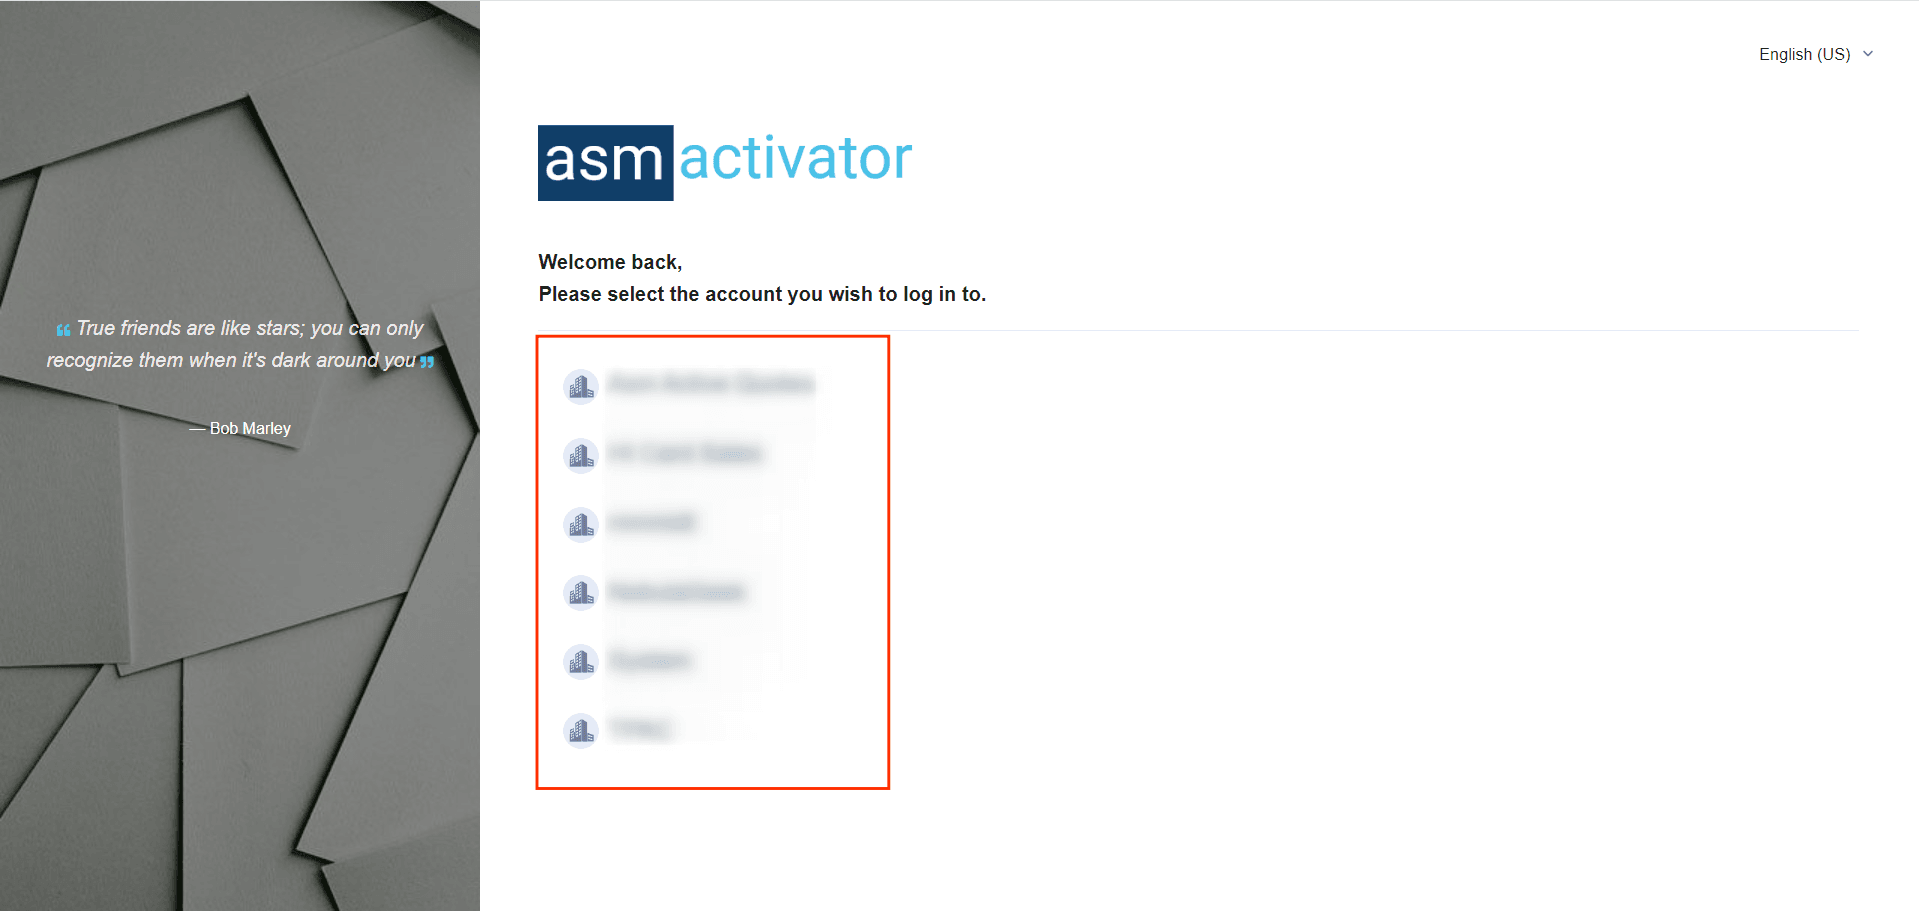
If you are associated with more than one tenant, you will see this page (image below) where you should choose the tenant you want to work with. Otherwise, if you are associated with only one tenant, Activator will redirect you directly to the home page.
Here is how the user interface looks on the Activator Client home page (after selecting a tenant for those with more than one 😎).
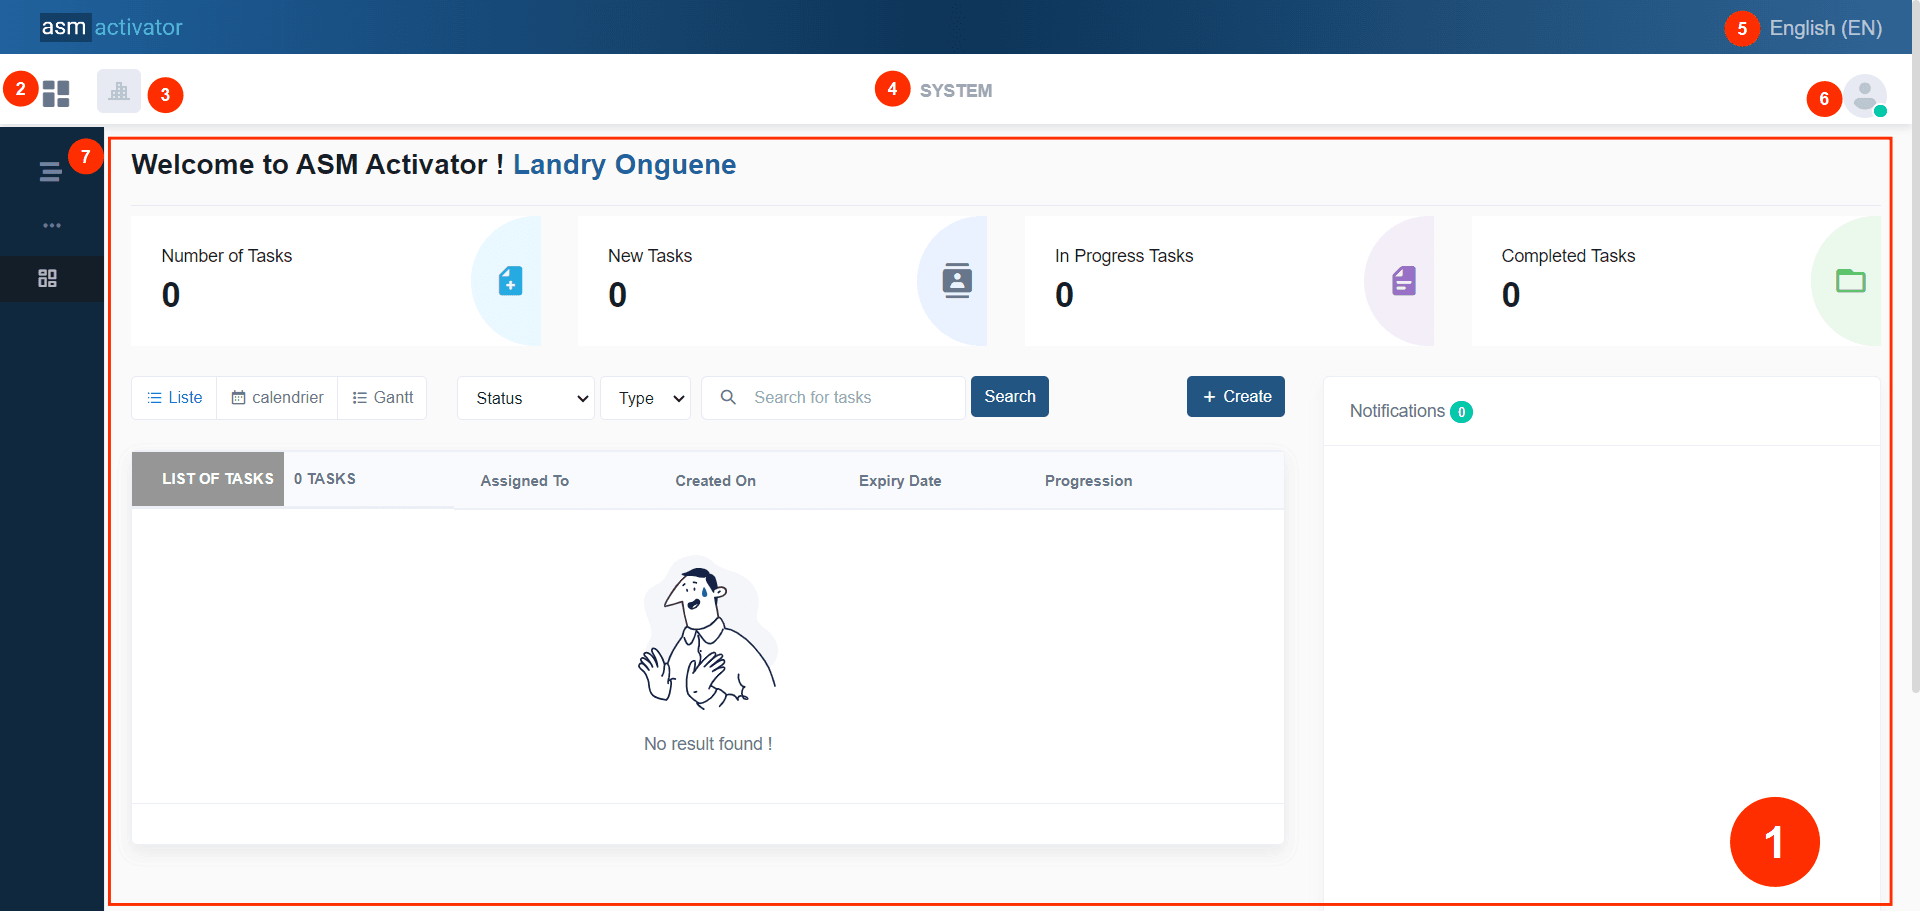
- The main container of the home page: It includes notifications, tasks, and some dashboards. This section is fully configurable by the user. Additionally, it is where the interfaces of modules configured on Activator Admin are displayed.
- Change Modules Button: Clicking here will display a popup containing the list of modules for this tenant. 🚨NB: The modules listed are also dependent on your privileges. See access management in the components [link] for more details
- Tenant Logo: At this level, the logo of the tenant you are connected to is displayed.
💡Tip: If you are associated with multiple tenants, clicking on it will allow you to select and connect to another tenant. For more details, click here [link]. - Tenant Name: At this level, the name of the tenant you are connected to is displayed.
💡Tip: If you are associated with multiple tenants, clicking on it will allow you to select and connect to another tenant. For more details, click here [link]. - Change Language Dropdown: Use this dropdown to select the display language. Currently, English and French are supported, with English as the default language.
- User profile picture: Clicking on it opens the user menu. For more details, go to [link: Manage My Account].
- Sidebar Menu: Here you will find all the different menus of the current active module. This menu will naturally change depending on the selected module. 🚨NB: It is also important to note that some menus will be visible or not depending on your privileges and the configuration implemented on them. See menu management [link] for more details.
👍 Now, let's delve into the details of the functionalities mentioned above.
Main Content
The "Main Content" refers to the main section of Activator Client that displays the primary content or essential information intended for users. It is where you typically find central elements of the interface, such as dashboards, important data, key features, and so on.
⚙️It is fully configurable and is the result of rendering components such as layouts, content providers, or drivers.
Change Modules Button
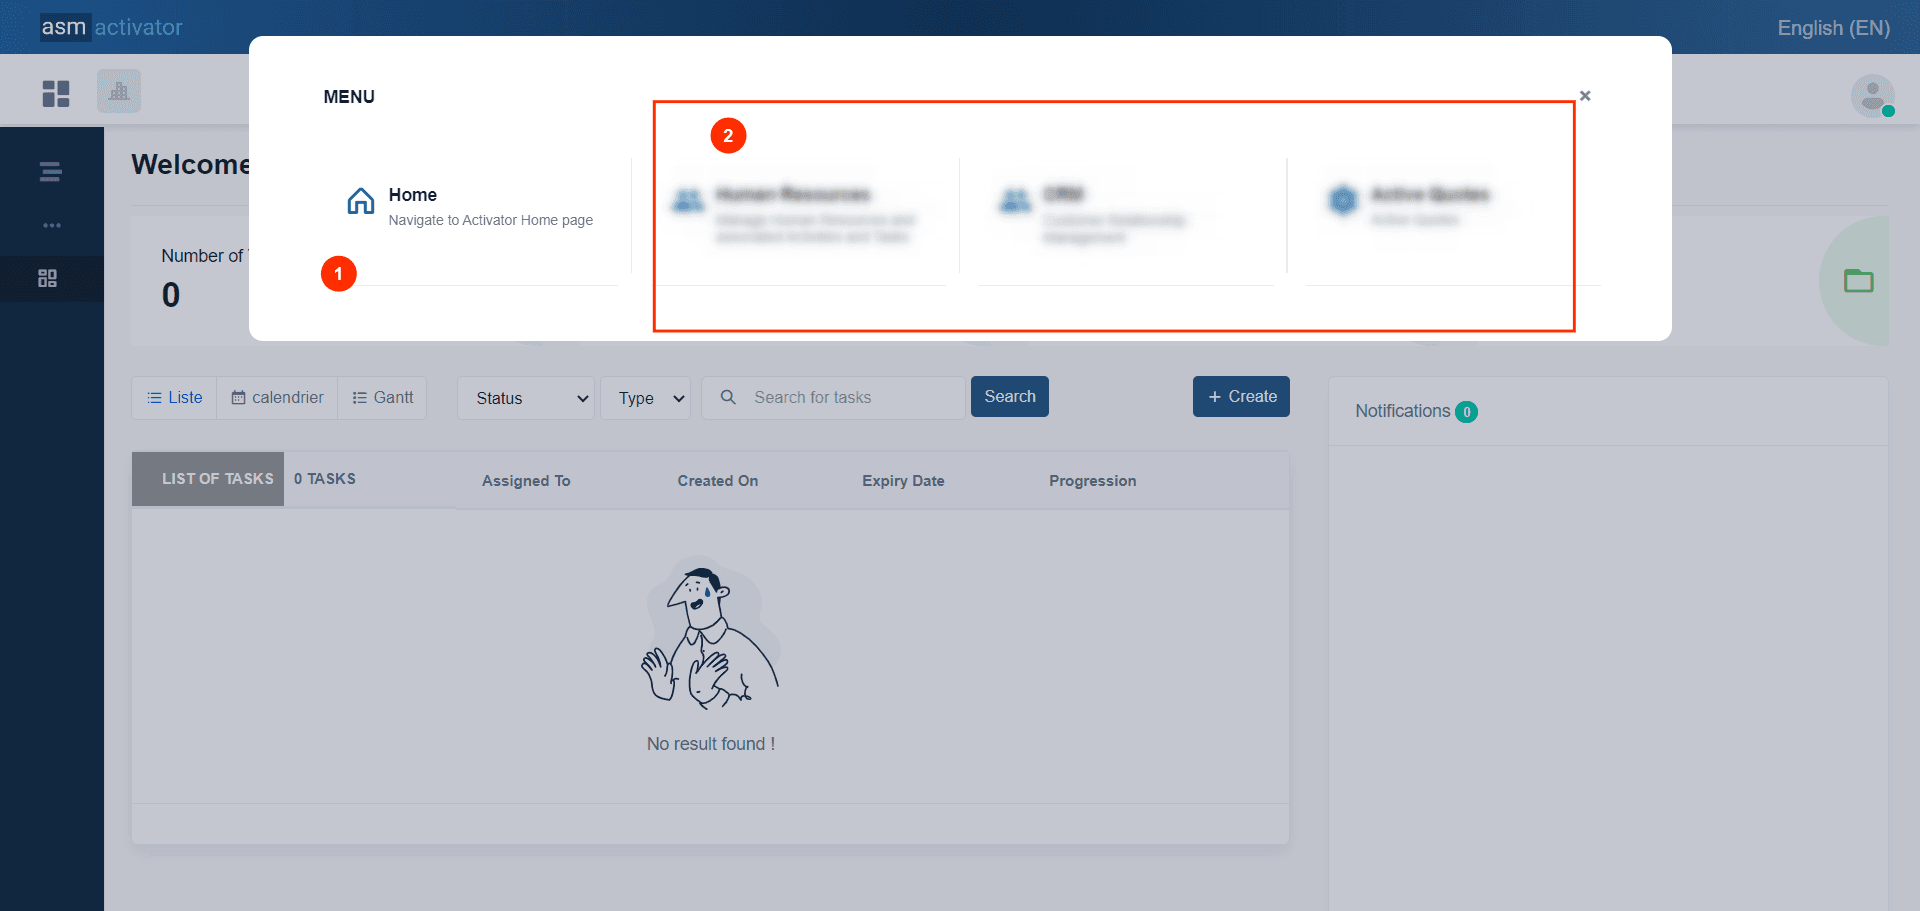
When clicking on this button, a popup appears displaying a list of cards as shown in the image below. The card N1, located at the far left, represents the link to return to the home interface. The remaining cards, located to the right and below, represent the list of modules configured for the authenticated tenant and are listed based on our privileges. For further details, refer to access management in the components. This feature is primarily managed by the Navigation Menu component
- Button to return to the home interface
- List of available modules
Upon clicking an item in this list, the popup will close automatically, and the list of items in the left menu will be updated to correspond to the selected module.
Change Tenant
✋IMPORTANT
This feature is only available for users who are associated to more than one tenant on Activator.
By clicking on the tenant's name or logo, a popup will appear on the right side of the screen, as shown in the image below. This popup will display the list of tenants associated with your user account, allowing you to select the new tenant with which you wish to reconnect, as illustrated in the image below.
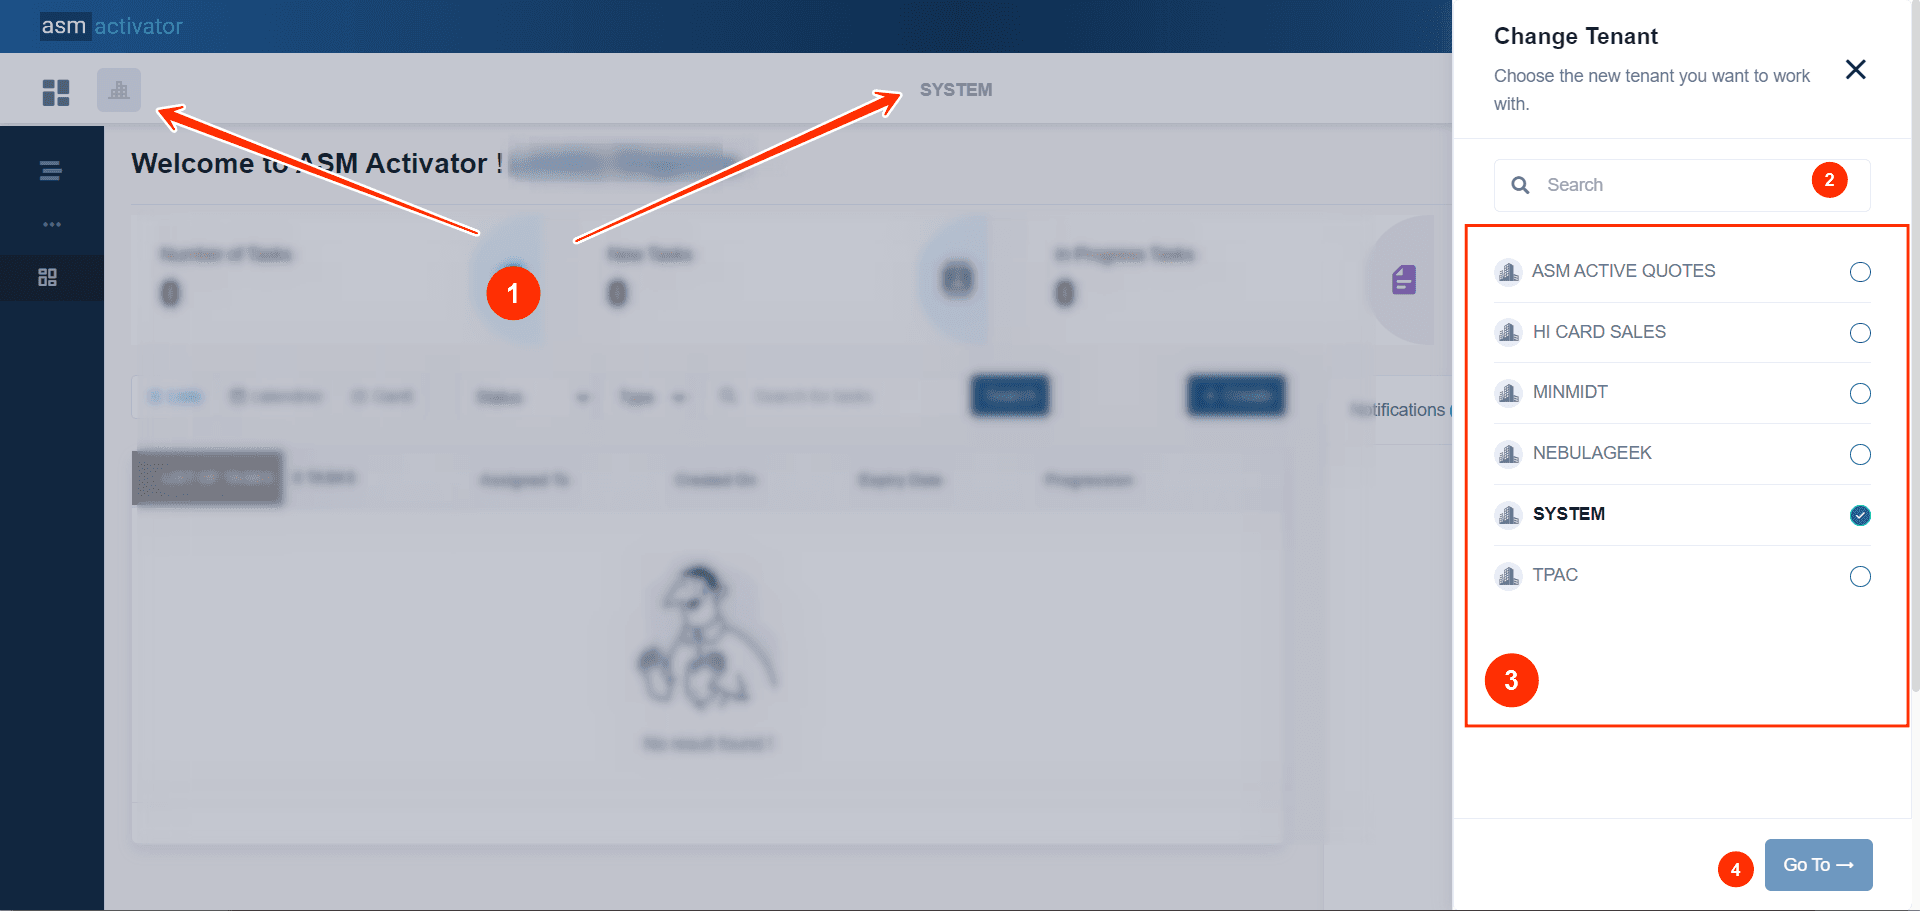
- Tenant Logo (on the left) and Tenant Name (on the right): Clicking on either of these opens the right-hand popup.
- Search Engine: It filters the list of tenants (in point 3) based on the search term entered.
- List of Tenants: Displays the tenants associated with your user account.
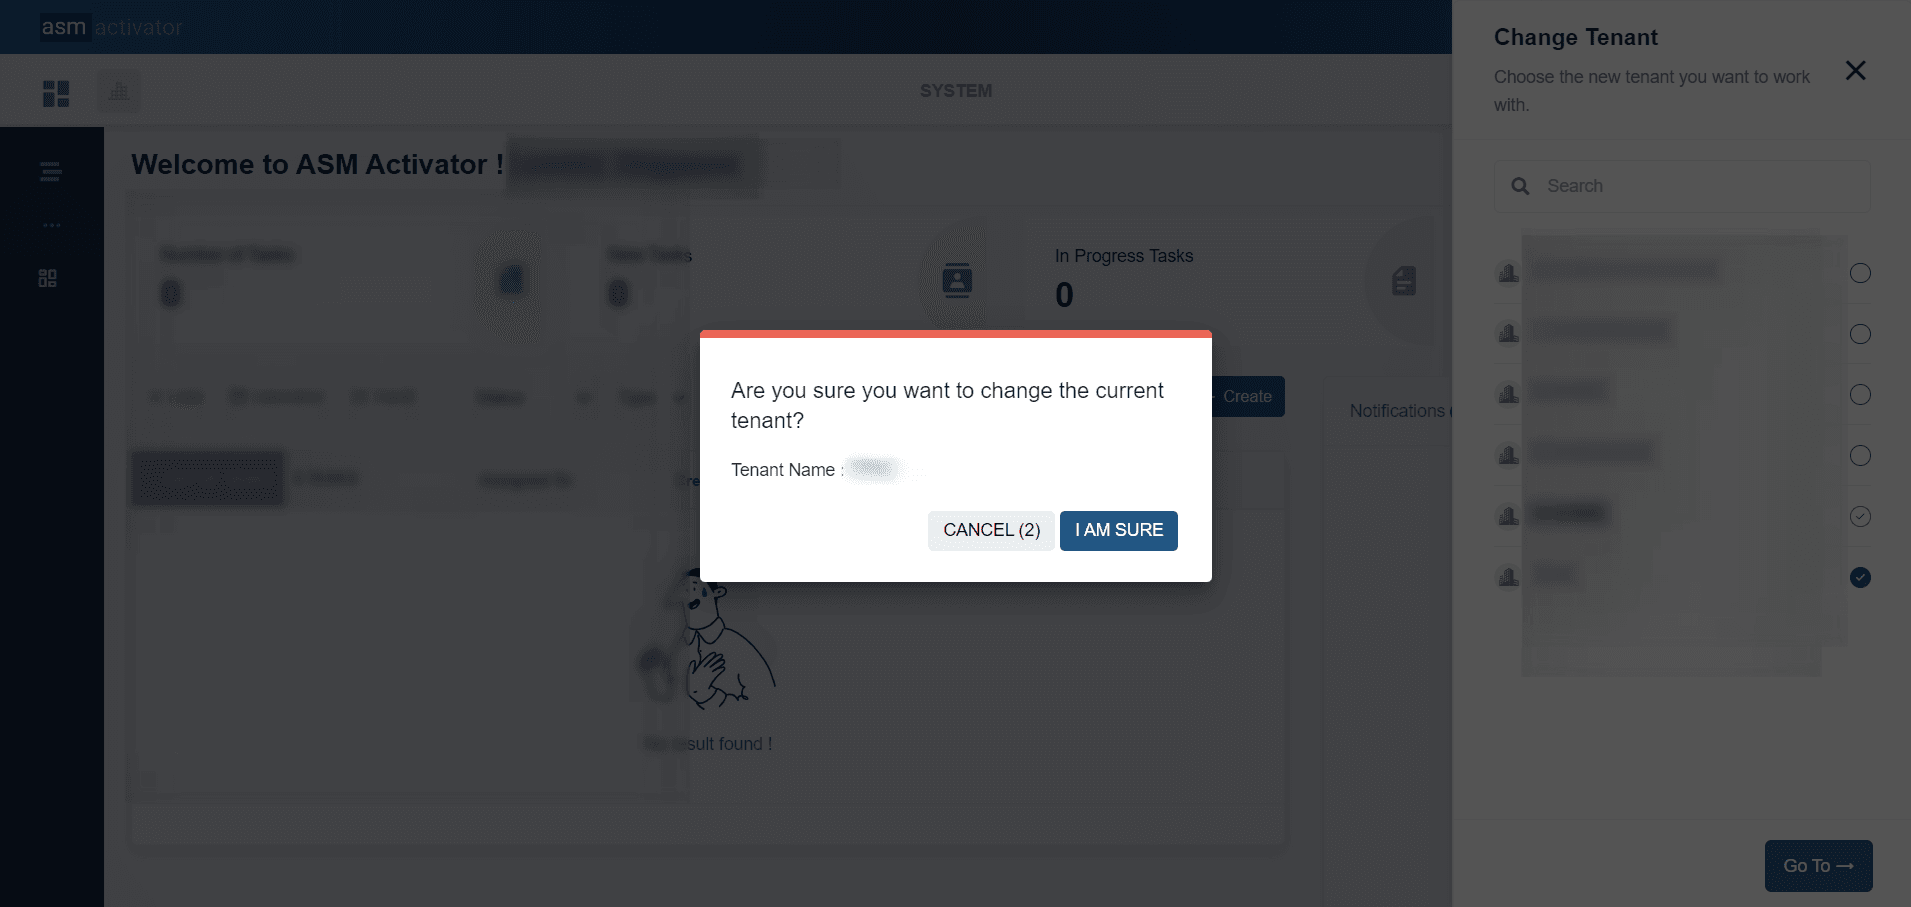
- Button to Change Tenant: Clicking this button prompts an alert asking you to confirm the tenant change, as illustrated in the image below.
Sidebar Menu
The sidebar menu of Activator Client is where all the direct and main links to access various module functionalities are located. ⚙️It is fully configurable and is the result of rendering components such as Menu Sections and Menu Items
✍️Note
The menus listed for you will also depend on your roles and privileges.
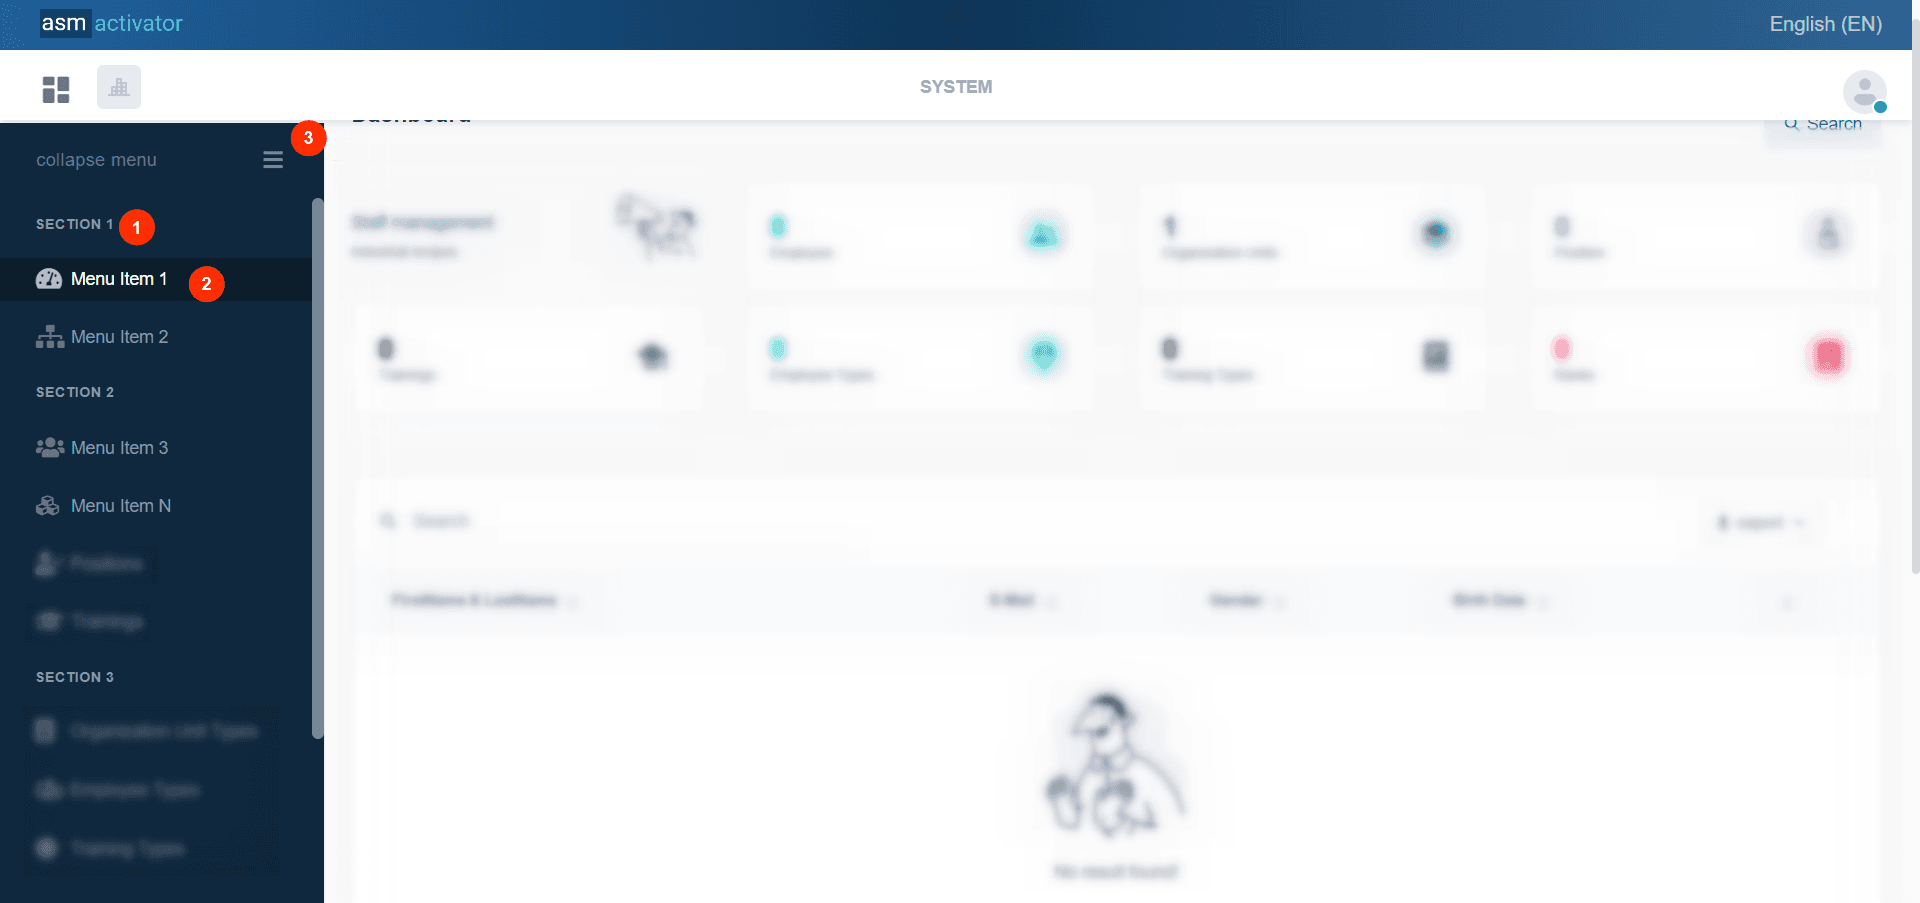
- Menu section: This part of the menu is not a link itself but rather an organization grouping similar or related elements. This feature is primarily managed by the Menu Sections component
- Menu Item: These are direct links to specific functionalities within a module. This feature is primarily managed by the Menu Items component
- Collapse menu button: It allows collapsing or expanding the sidebar menu, saving screen space and making navigation smoother.
User Menu
The user menu consolidates all the options and functionalities for the logged-in user to manage their account and access personal settings on the platform.
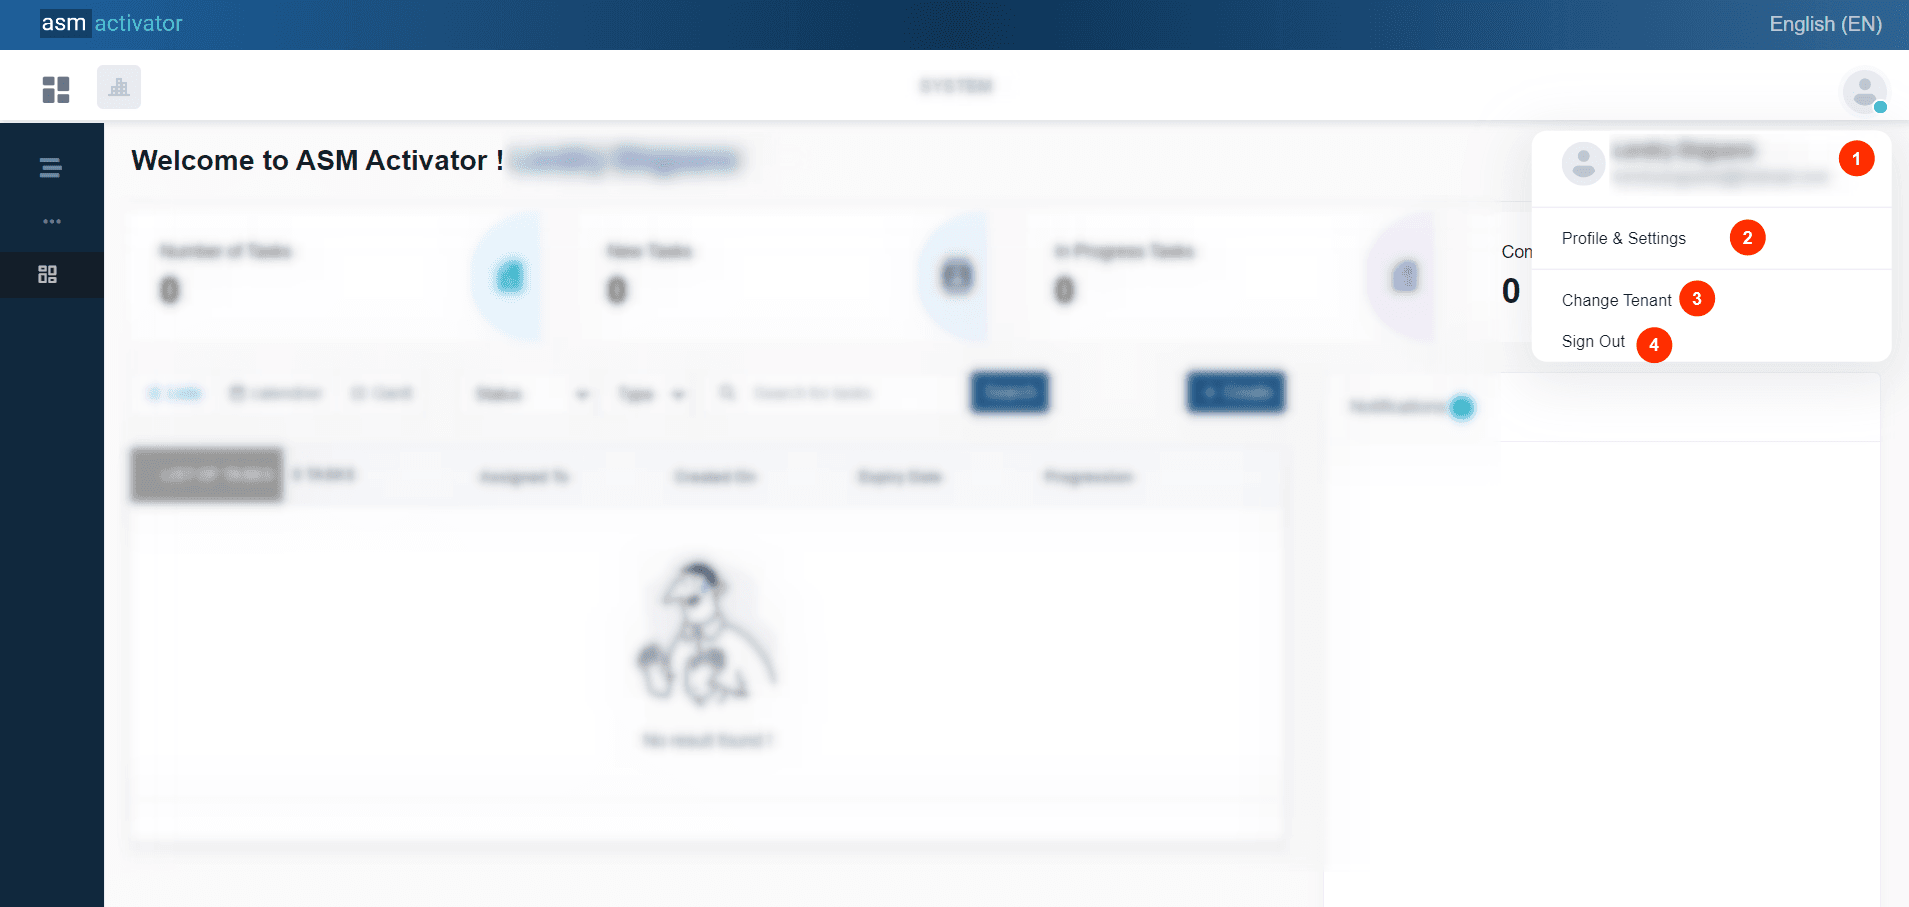
- Here, your full name (first name and last name) and email address associated with your account are displayed.
- Account Settings and Configuration: This section allows you to manage your account's primary information, change your password, and configure multi-factor authentication (MFA).
- This link allows changing tenants.
- This link allows you to log out.
Let's delve deeper by clicking on Account Settings and Configuration section, where you can manage your account's primary information, change your password, and configure multi-factor authentication (MFA).
The account configuration popup is divided into three sections:
- Account Information🧾: Allows you to view and modify basic information such as your name, email address, etc. You can also change your profile picture here.
- Change Password🔑: Allows you to modify your password for account security.
- Multi-Factor Authentication (MFA)🔐: Provides the option to configure an additional authentication method to enhance the security of your account.
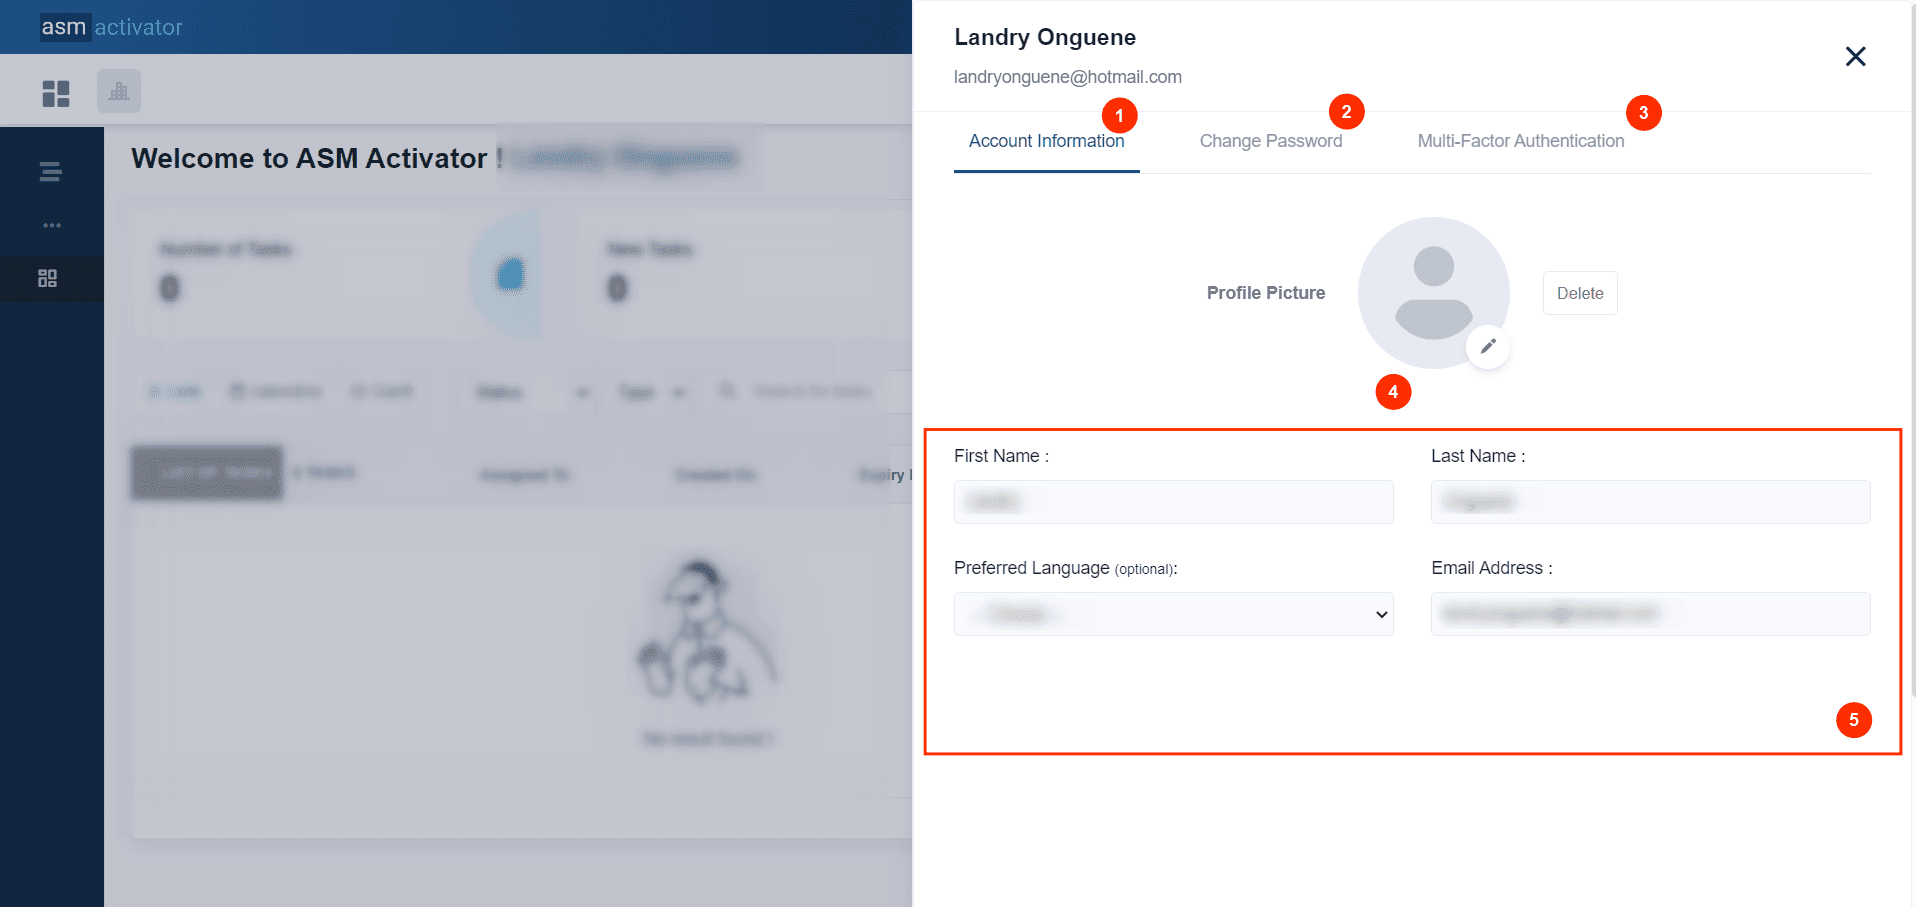
Account Information
Here (the current tab in the image above), we can see the basic information of our account and change our profile picture. To change your profile picture, simply click on the avatar/your current profile picture (shown as 5 in the image above). Once the image is selected, a popup will open allowing you to view and crop your new profile picture👨💼.
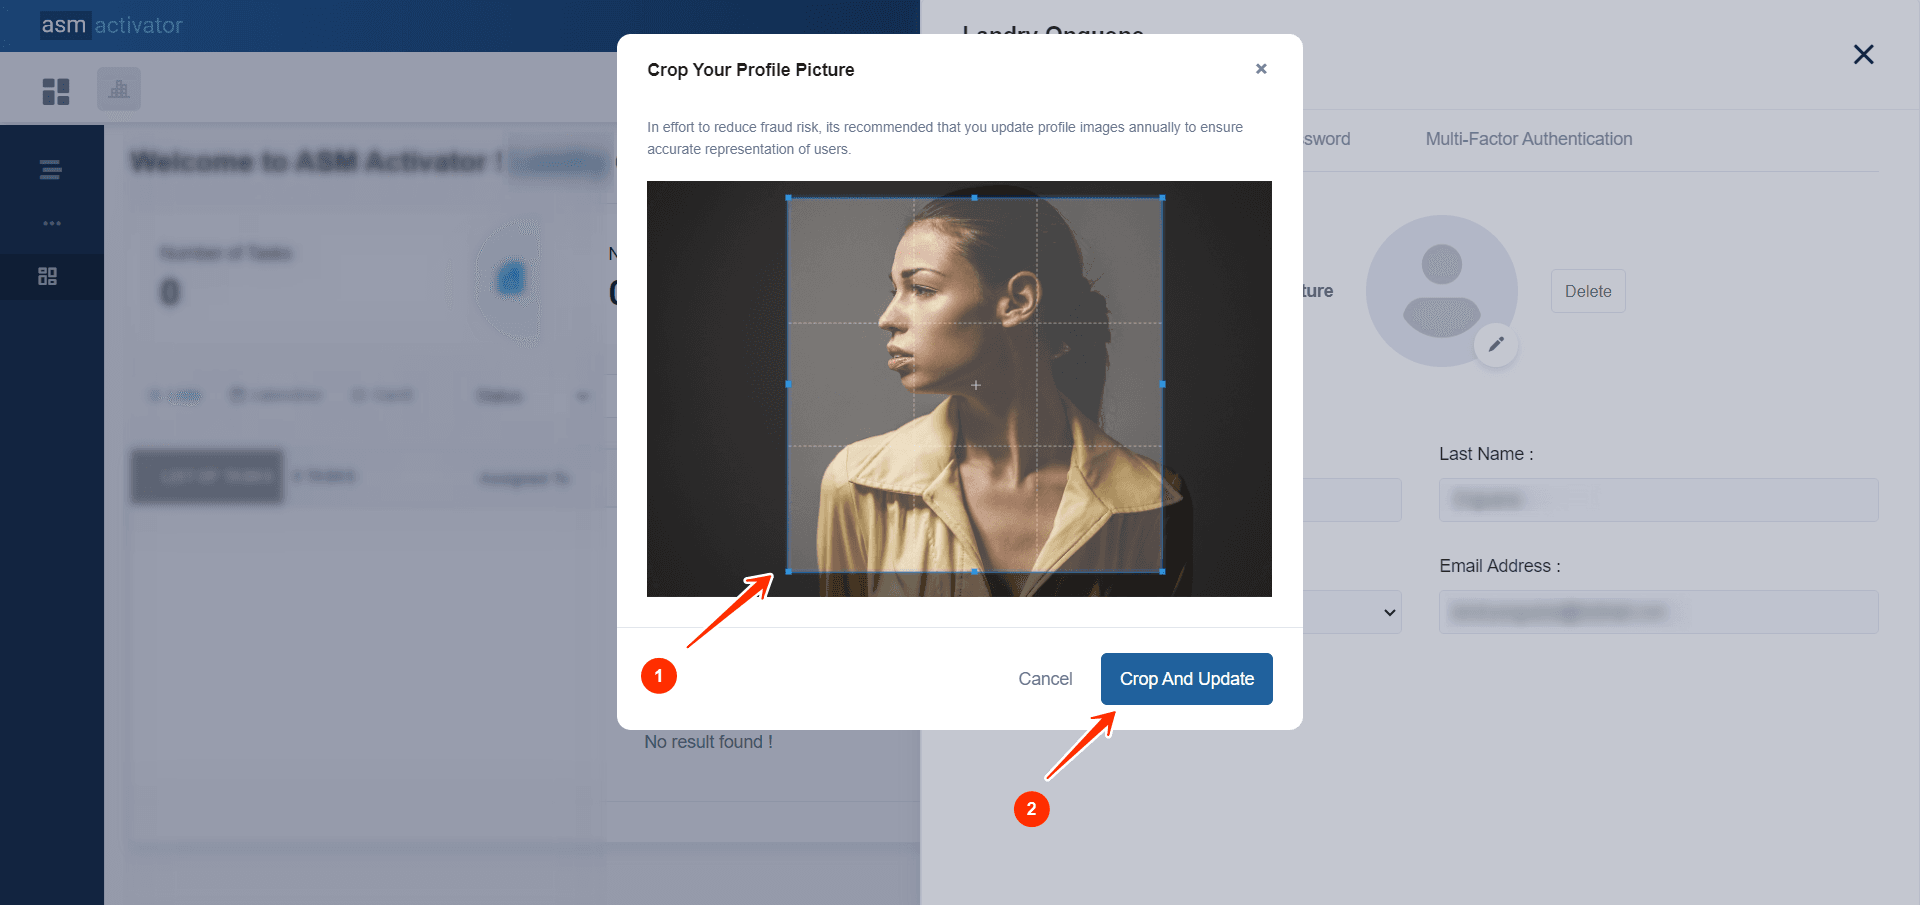
- Cropping frame: This is the area where you can adjust and crop your new profile picture before updating it.
- Crop and update button: This button finalizes the cropping process and updates your profile picture with the newly cropped image.
Change Password
To change your password, go to the "Change Password" tab in your account settings popup. Enter your current password (for verification), then input your new password. Confirm the new password, then click "Update Password" to save the changes. Be sure to confirm your new password to complete the process.
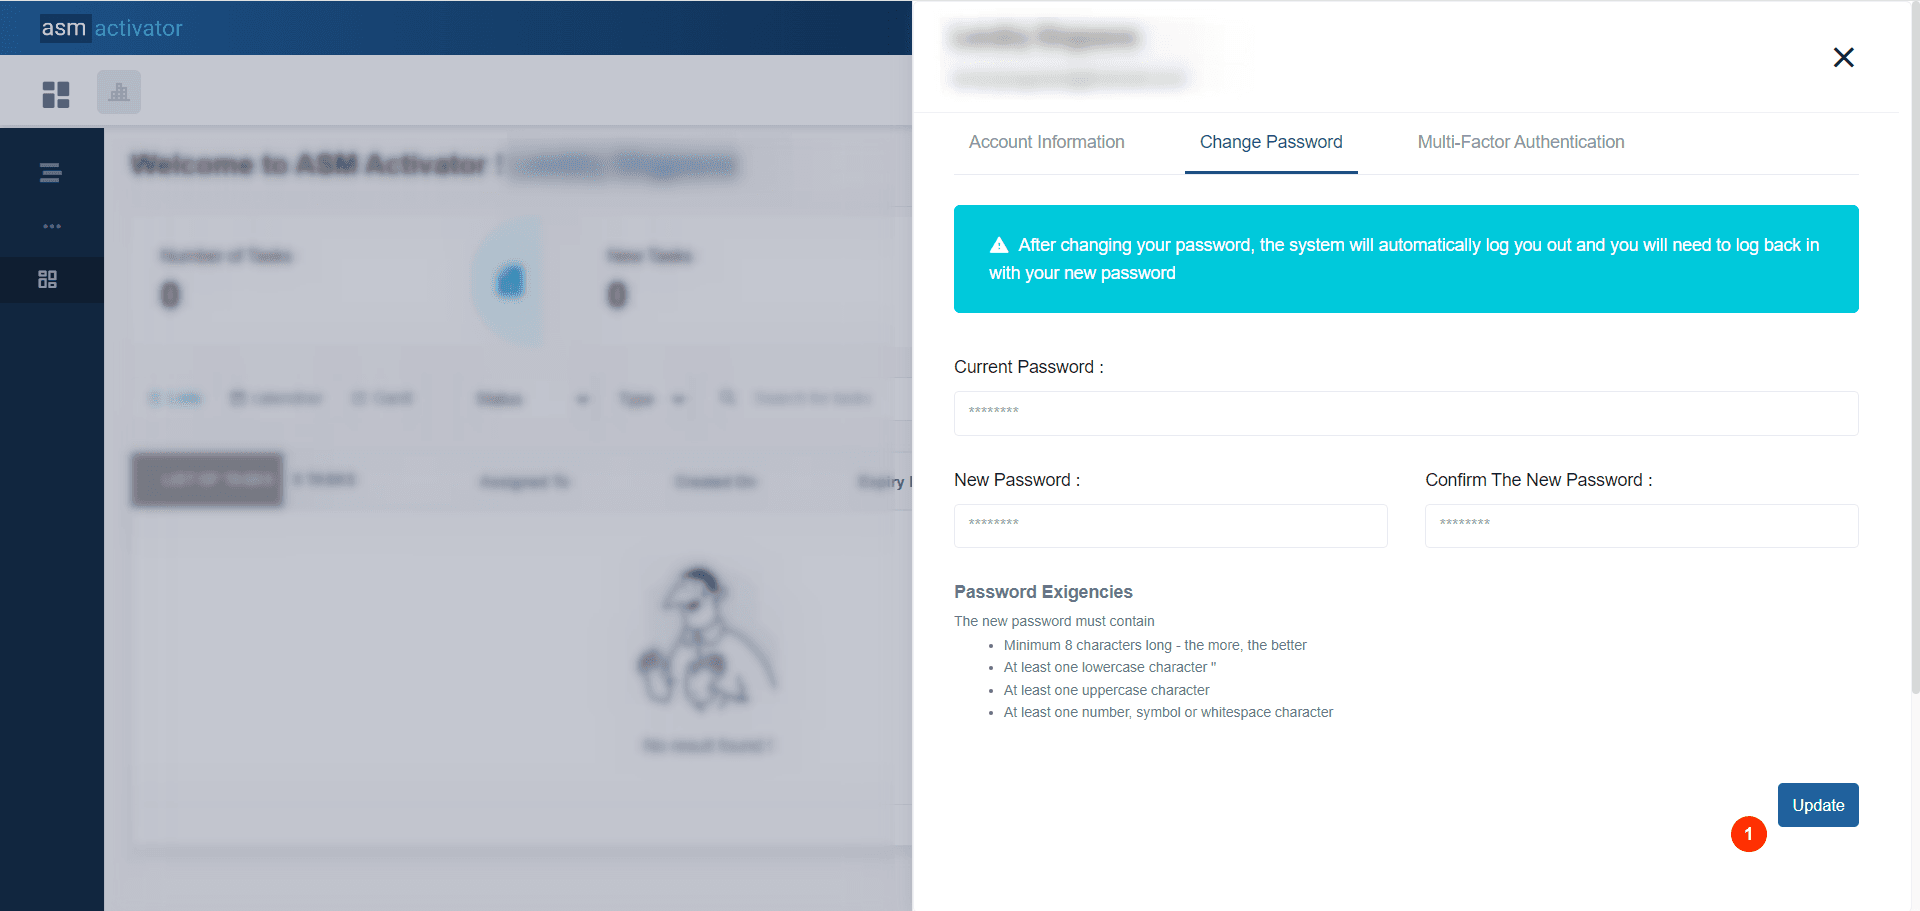
🔐Password Exigencies
The new password must contain:
- Minimum 8 characters long - the more, the better
- At least one lowercase character
- At least one uppercase character
- At least one number, symbol or whitespace character
Once you've completed this process, you'll be logged out and redirected to the login page, where you can log in using your new password.
Multi-Factor Authentication (MFA)

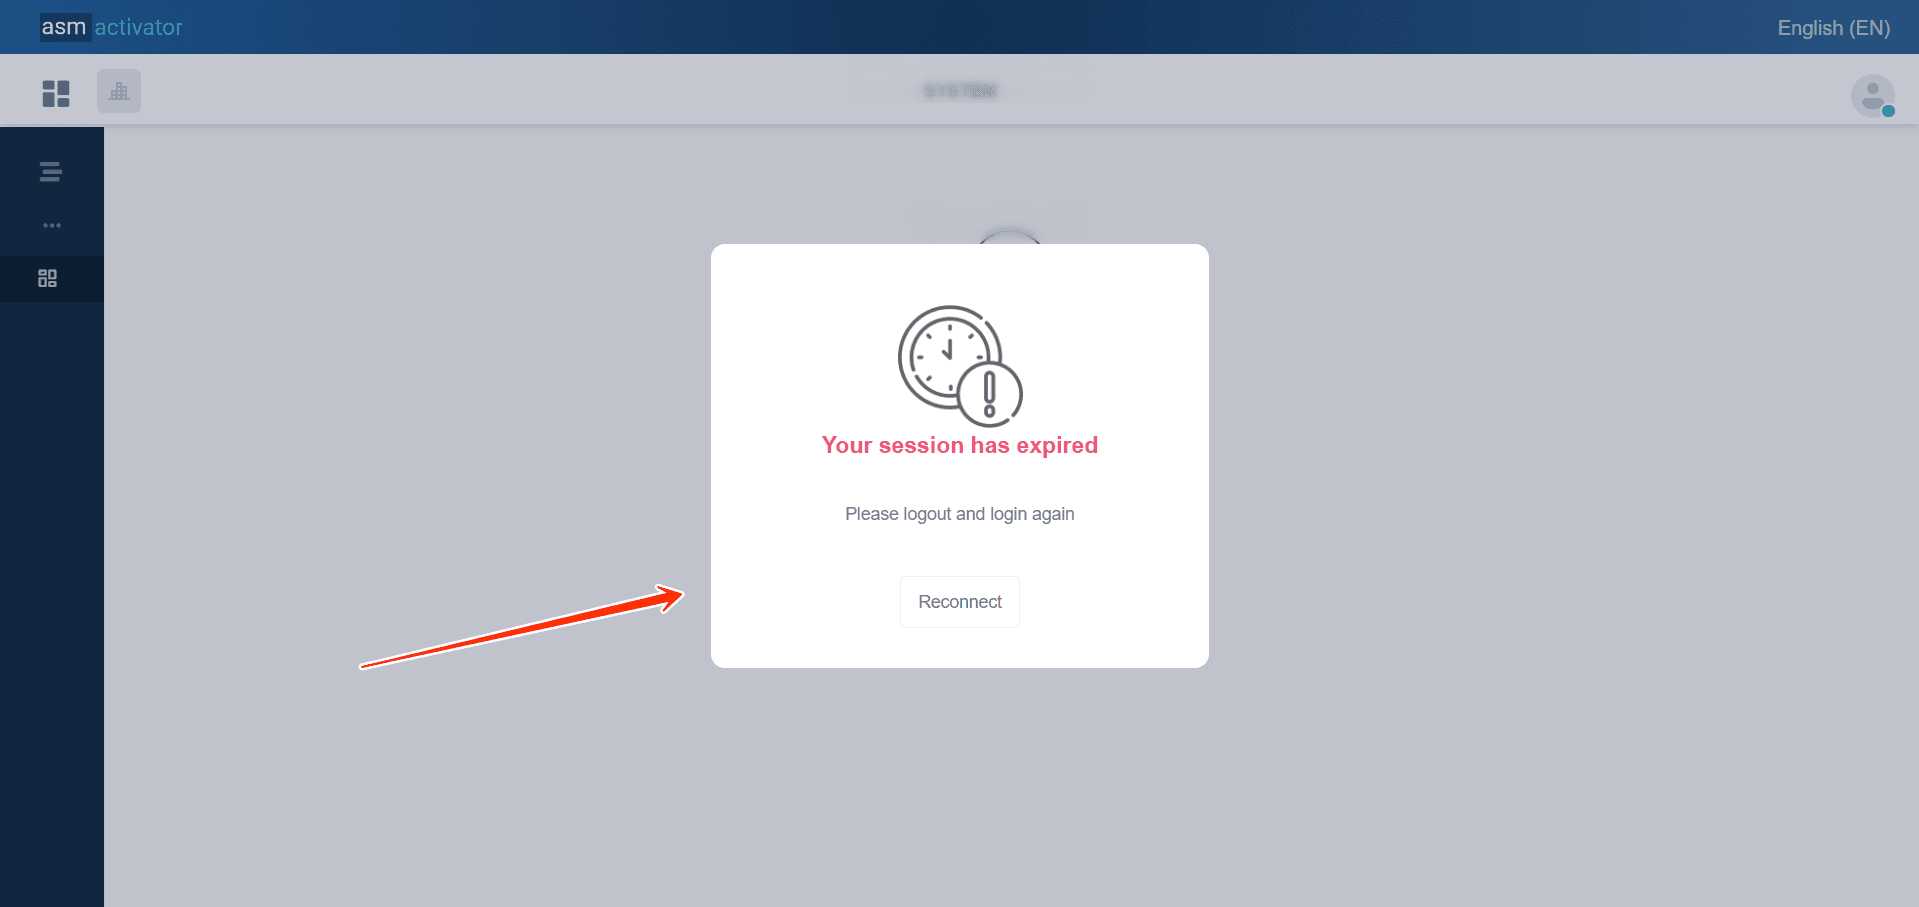
Session Expiration📴
On Activator Client, the session is limited to a certain duration for security reasons. When your session expires, a popup will open asking you to reauthenticate. This ensures the protection of your data and ensures a secure use of the platform. You can see the illustration of this process in the image below.
Conclusion👨🎓
Welcome aboard the Activator Client universe, where you've now explored the fundamental features to kickstart and manage your business operations👏. To delve deeper into your understanding and discover advanced functionalities along with configuration tools, we invite you to dive into the dedicated documentation for Activator Admin UI. Here, you'll find a wealth of information to optimize your use of Activator and fully leverage its capabilities.