Import Components
Activator's import functionality is essential for integrating components in different environments efficiently and accurately. It's important to understand how importing allows you to retrieve and reuse transferred elements to ensure consistency and continuity between environments.
How To Import
We'll guide you through using the import in a Activator environment. In our case, let's suppose we've exported components from the development environment, and we want to import them into the test environment, highlighting the steps to follow.
The Export functionnality can be accessed by clicking on Import/Export in the menu container. As shown in point (1) of the image below👇.
✋CAUTION
Make sure you are in the System Component main module.
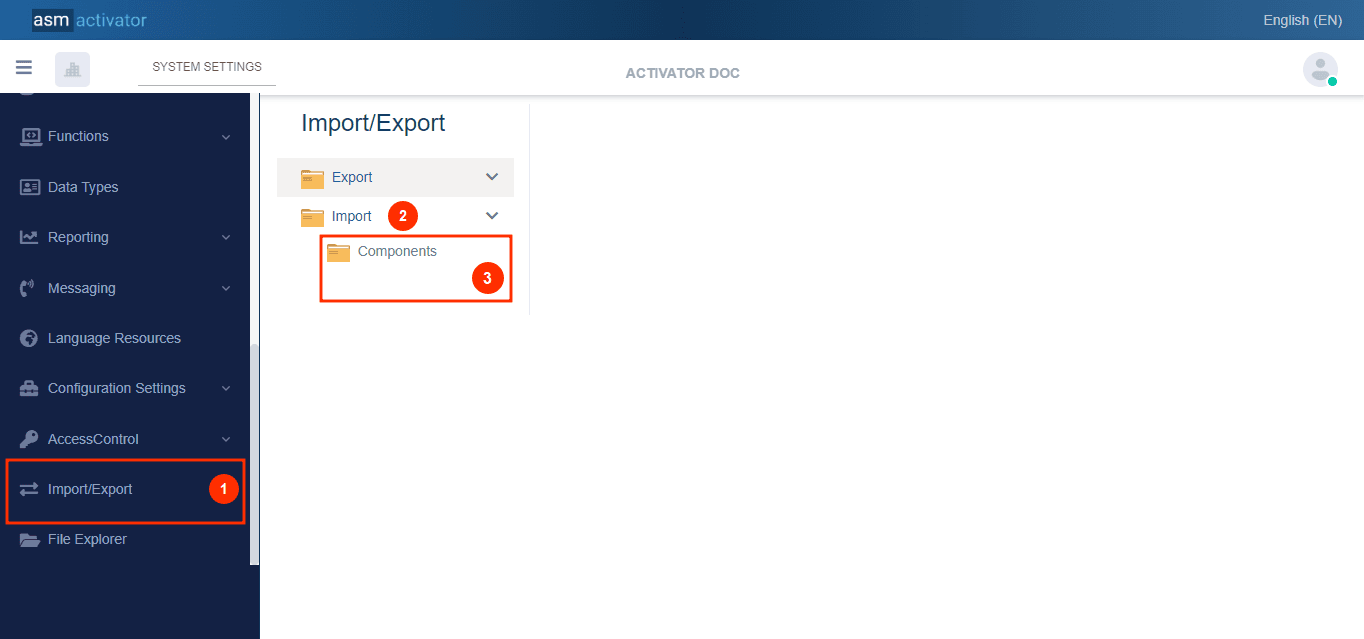
Access the elements that can be exported by clicking on Import🗂️(2)
(3). list of element(s) that can be imported. At present we can only import components, as you can see.
Click on Components🗂️ to view the tools that will help you Imort these components👇.
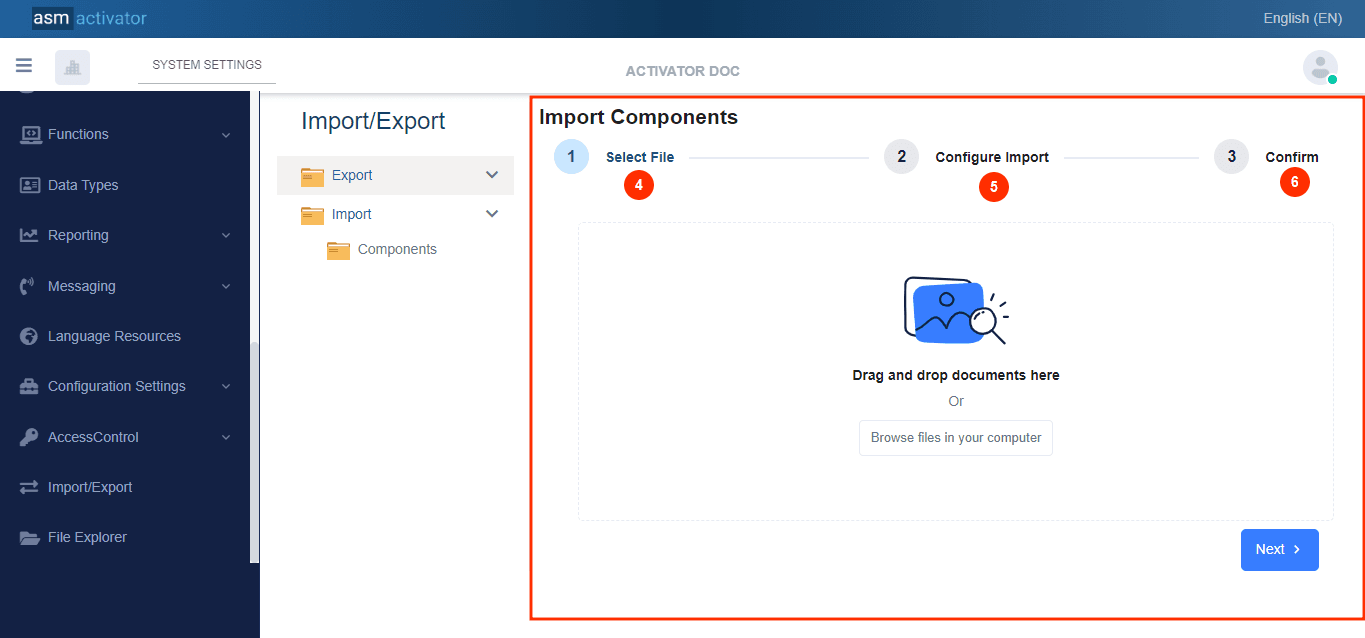
In the image above, you can see that in the main container, there is a three-level indication with points (4), (5), and (6) for performing a complete import.
(4). Select file
(5). Configure Import
(6). Confirm Import
Select File
Here you have two options:
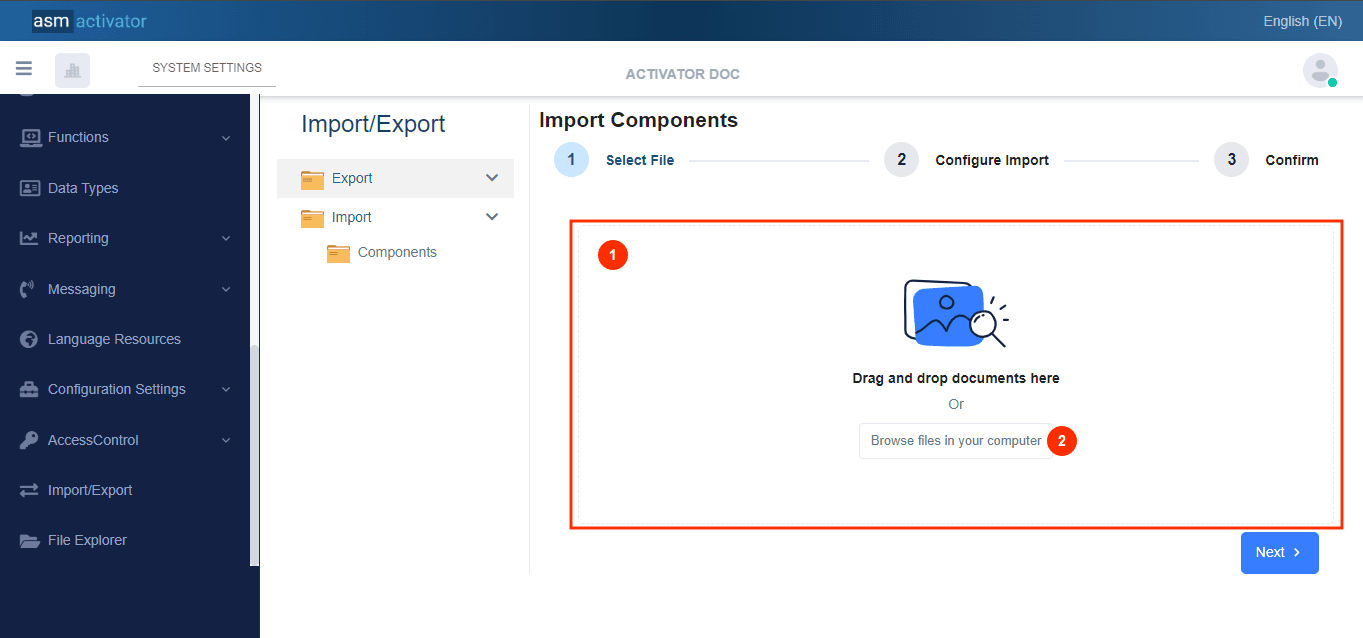
- Select a file from a directory on your computer that you have exported from a different environment by clicking the "Browse file in your computer" button (2)👇.
- Drag a file that you have exported from another environment into the frame (1)👇.
After uploading a file, we can see👇:
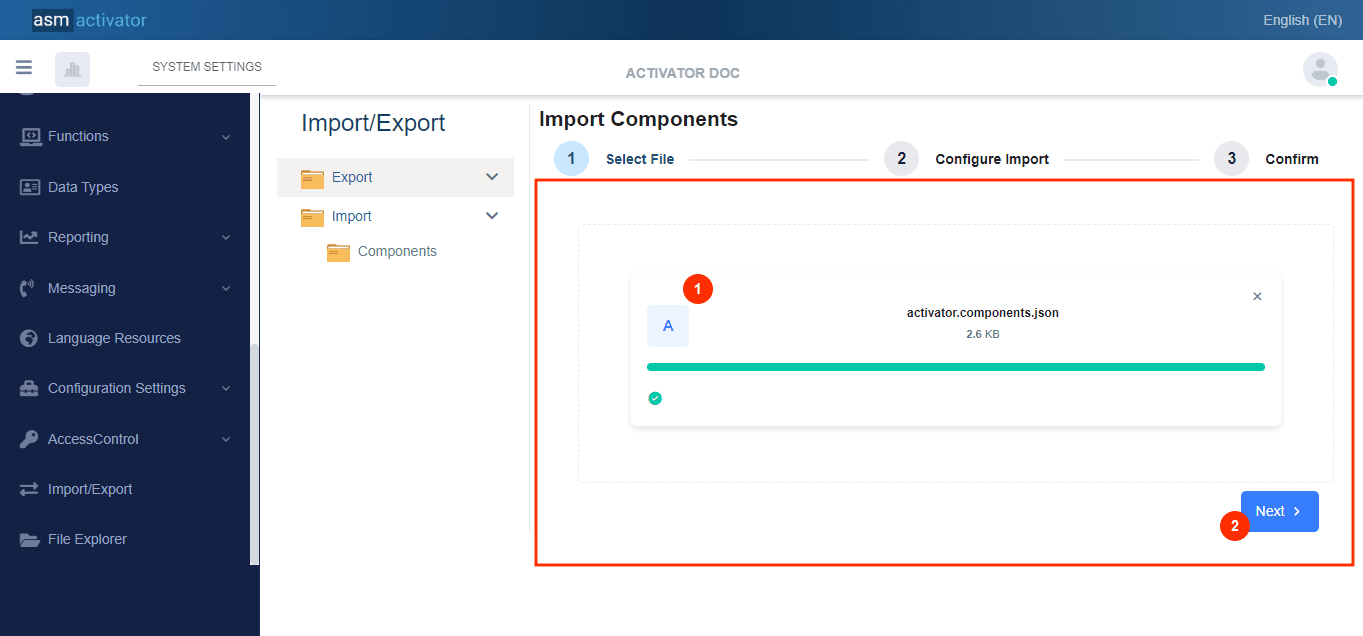
- The file is fully uploaded
- Proceed to the next step👇
Configure Import
In this step, you need to choose from all the components that make up the file you have selected the one(s) you wish to import.
You'll get👇 :
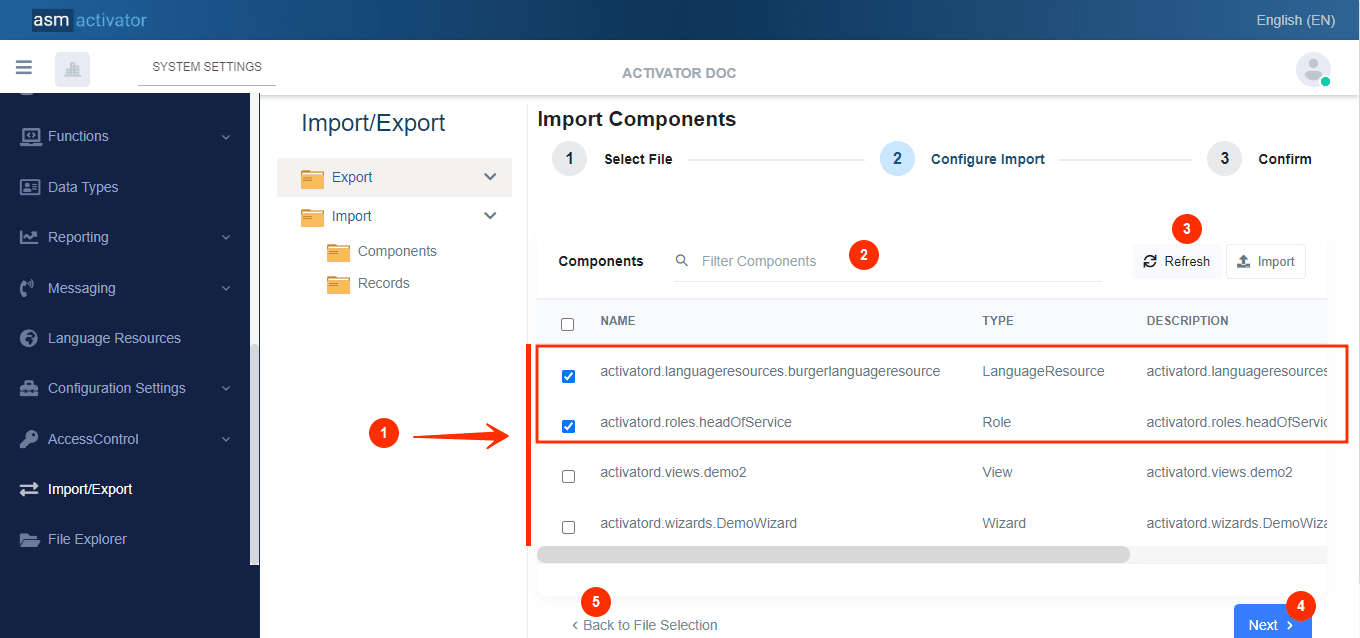
- List of components that make up your selection file
- Search bar
- Button to update
- Button to move on to the next and final stage
- Button to return to previous stage
Confirm
In this last step, you need to confirm👇 the import of the selected components.
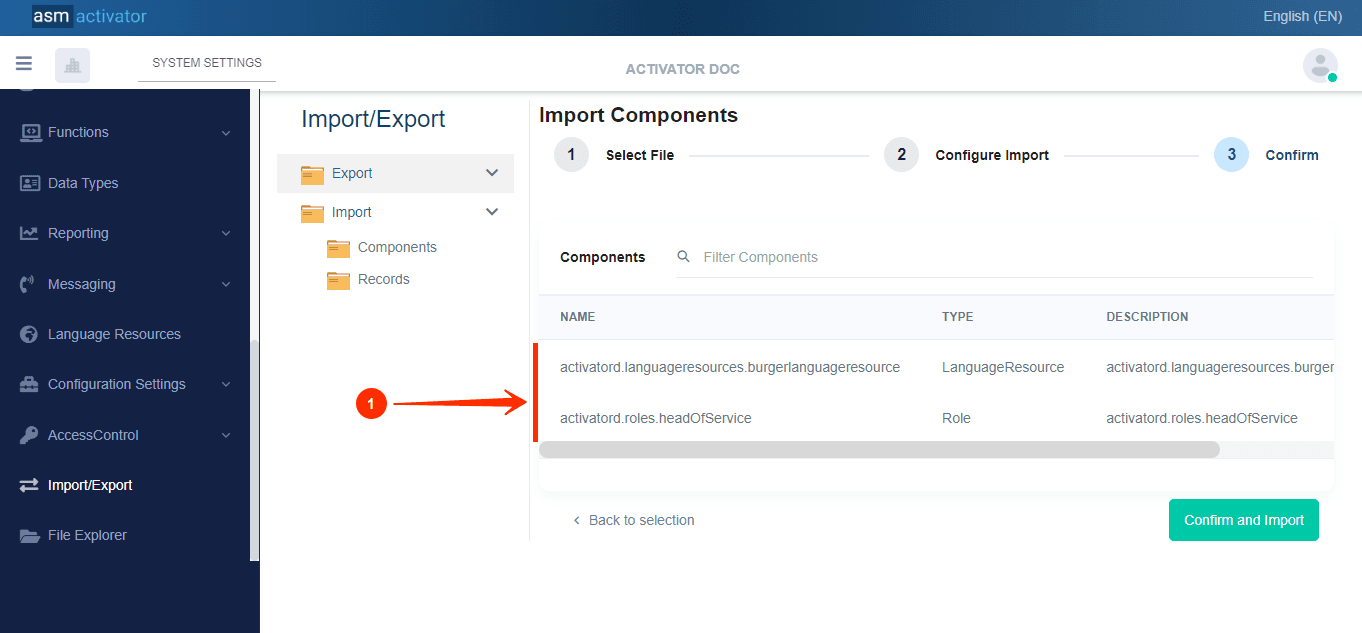
- List of components you selected in the previous step.
- Button to confirm import.
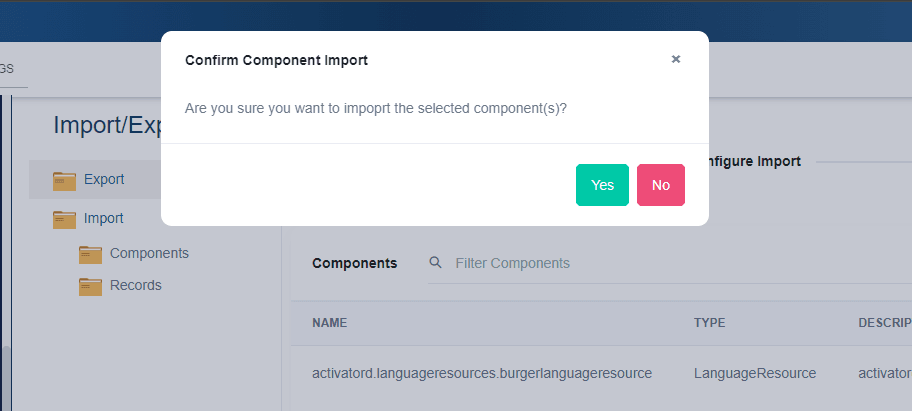
When you click on button (2) in the image above, Activator will prompt you through a modal👇 to either confirm or cancel this action:
By clicking on the Yes button, you will receive a success message indicating that the import was successful👇.
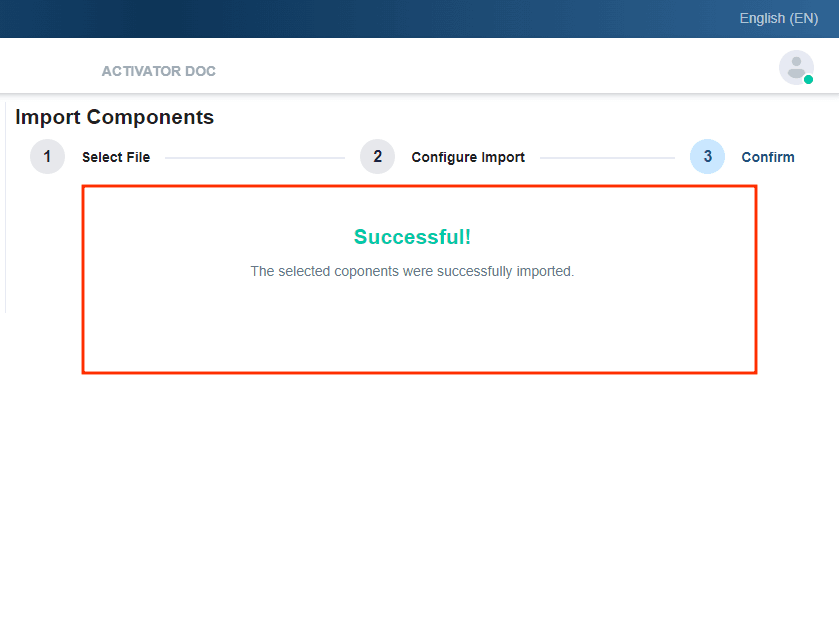
Congratulations on completing the import on an Activator environment.
✋CAUTION
For import, if a component present in the file to be imported does not exist in the envrionnment, this component will be created and copied for this tenant in this envrionnment. On the other hand, if the component you wish to import already exists in the environment for this tenant, then the old value of the component already present in the environment will be overwritten by that of the component you wish to import.
Conclusion
Importing components into the Activator environment involves three main steps: file selection, import configuration and final confirmation. This process ensures efficient and consistent integration of transferred elements between different environments.