Quick Start Guide
Activator (cloud-hosted ERP) is accessible through three different platforms:
- Web Client Platform: 💻Access the web client platform using the https://client.asmlogic.com . This is where users perform their business processes and utilize ERP features to efficiently manage their activities.
- Configuration Web Platform: ⚙️For the technical team responsible for configuration, creation, and deployment of modules, visit the configuration web platform via https://admin.asmlogic.com .
- API Service: 🌍Utilize our API service with specific security criteria to access Activator in a customized and secure manner. For more information on API usage, refer to our dedicated API documentation. You can find the list of the API URLs in the section below.
✏️ Note
Additionally, our solution offers the flexibility to deploy the ERP on a client-provided server to meet unique infrastructure needs.
Environnements and URLs☁️
Activator platforms are available across three distinct environments:
- Development Environment (dev): Used for initial feature development and testing.
- Testing Environment (test): Designed for comprehensive ERP testing before production deployment.
- Production Environment (pro): The primary environment where the ERP is operational for regular use by end users.
URLs List (web platforms and APIs)
Feel free to explore these platforms, environments, and API capabilities to enhance your experience with ASM Activator.
| URL | Description |
|---|---|
| Activator Client (web portal) | |
| Activator Admin (web portal) | |
| Module APIs | |
| Security Module APIs | |
| Schema API | |
| Reporting API | |
| Notifications API |
Presentation of the Different Platforms
✏️ Presentation of the Different Platforms
To access the various Activator platforms (client and admin), you must first have a user account associated with an Activator tenant (client). If you do not have an account, please contact the tenant administrator to create one for you. For more information about accounts and security modules, click here.
Client Portal
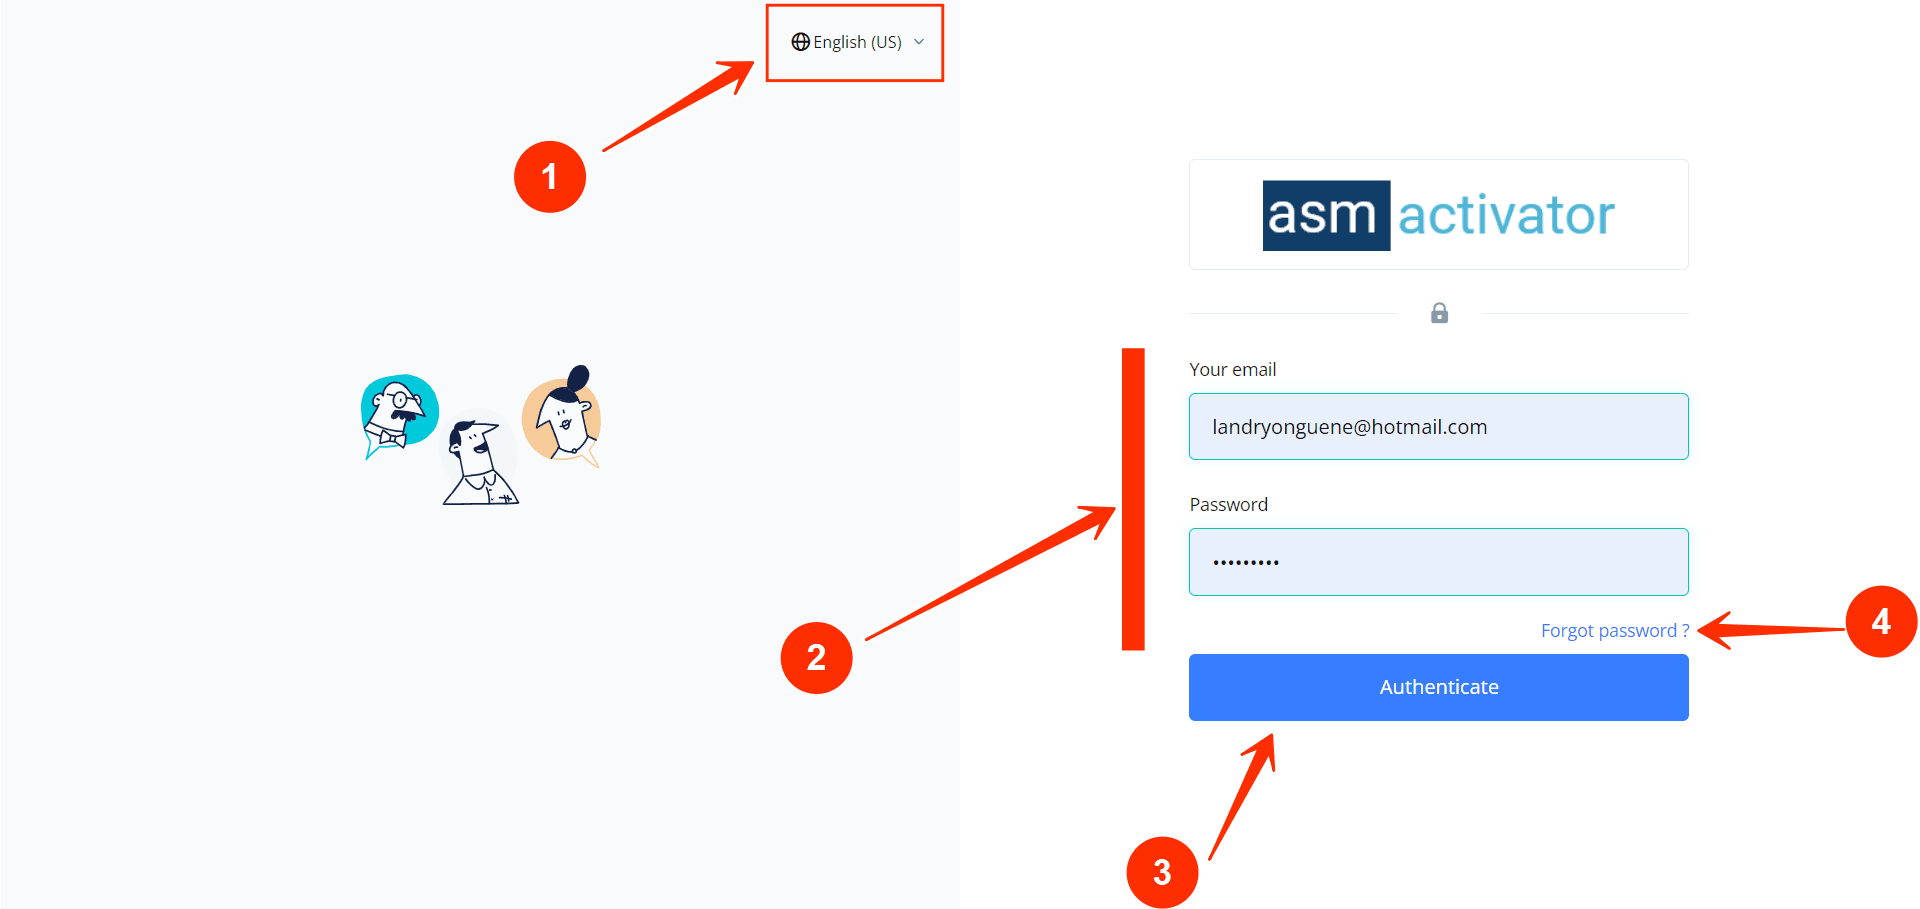
Open https://v2_client_dev.asmlogic.com, you will be redirected to the login page (if you are not authenticated yet).
✋Caution
you can try this documentation with any environnements, but its recommended to use the dev environnement

- Change Language Dropdown: Use this dropdown to select the display language. Currently, English and French are supported, with English as the default language.
- Login Form: This is where users input their credentials: email and password.
- Login Button: Click this button after entering your credentials (email and password) to log in to the system..
- Password Reset Button: Use this button if you have forgotten your password and need to reset it. If you need more information about this functionality, click here
⛳Let's click on the login button and access the Activator homepage.
🗒️NB
If you are associated with more than one tenant, you will see this page (image below) where you should choose the tenant you want to work with. Otherwise, if you are associated with only one tenant, Activator will redirect you directly to the home page.
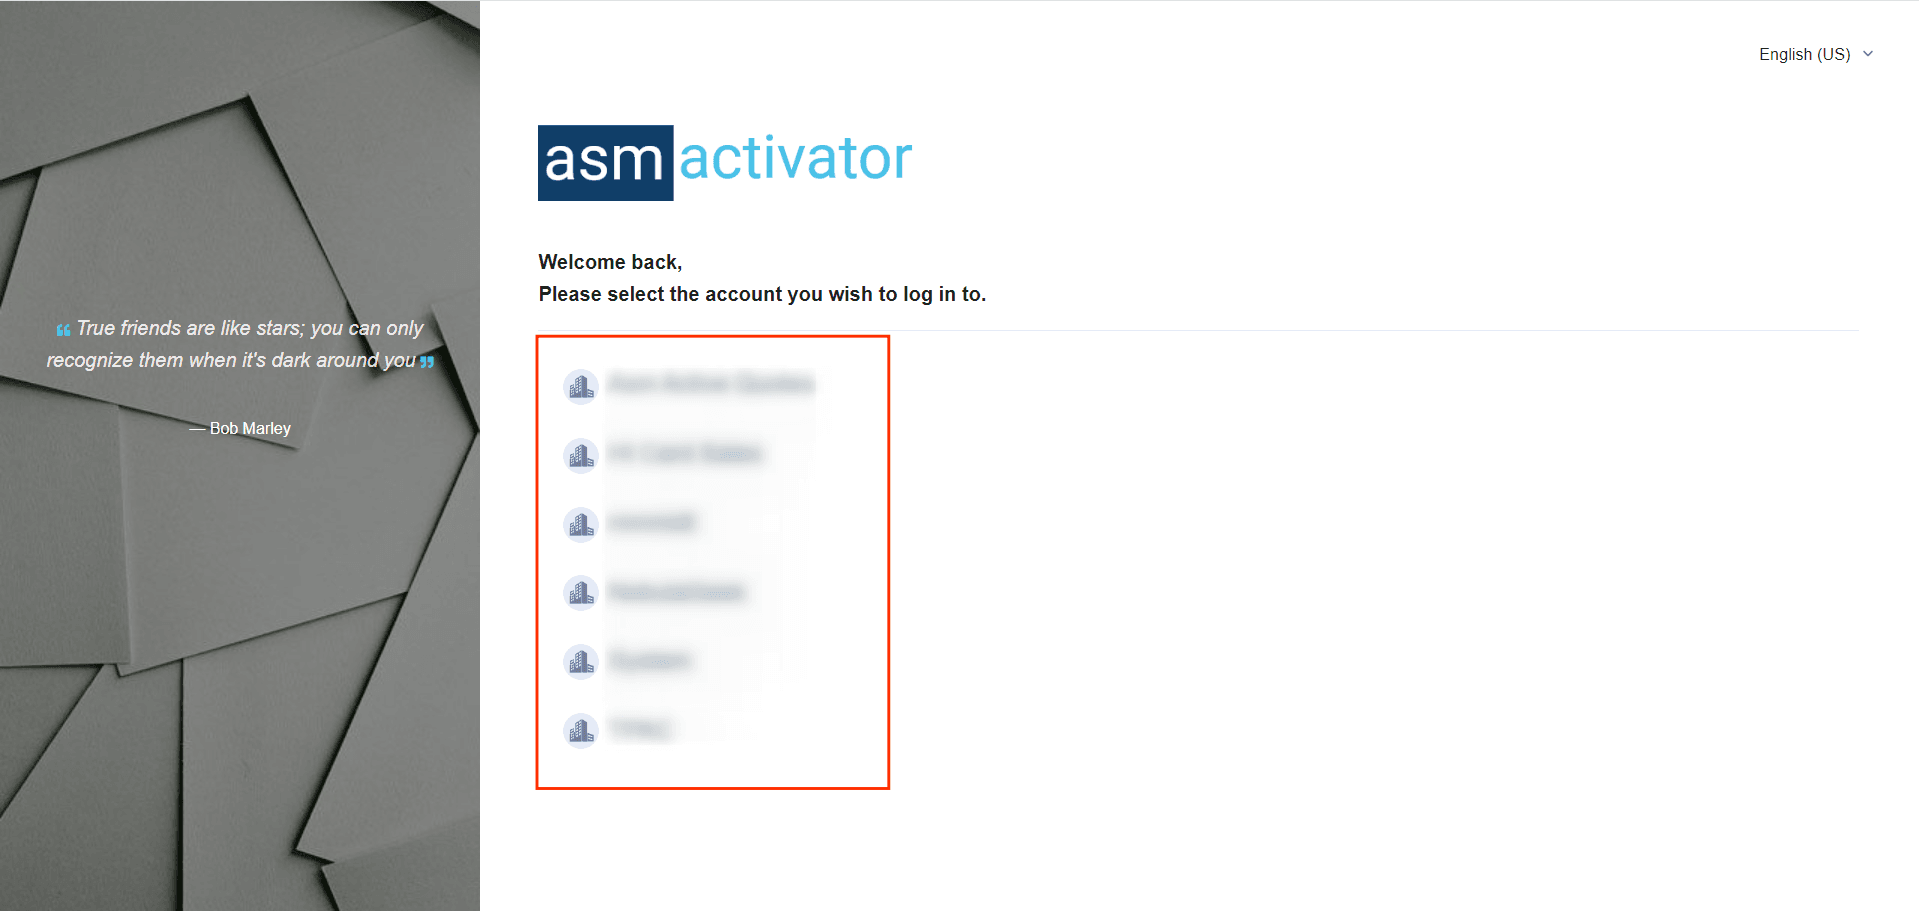
Here is how the user interface looks on the Activator Client home page (after selecting a tenant for those with more than one 😎).
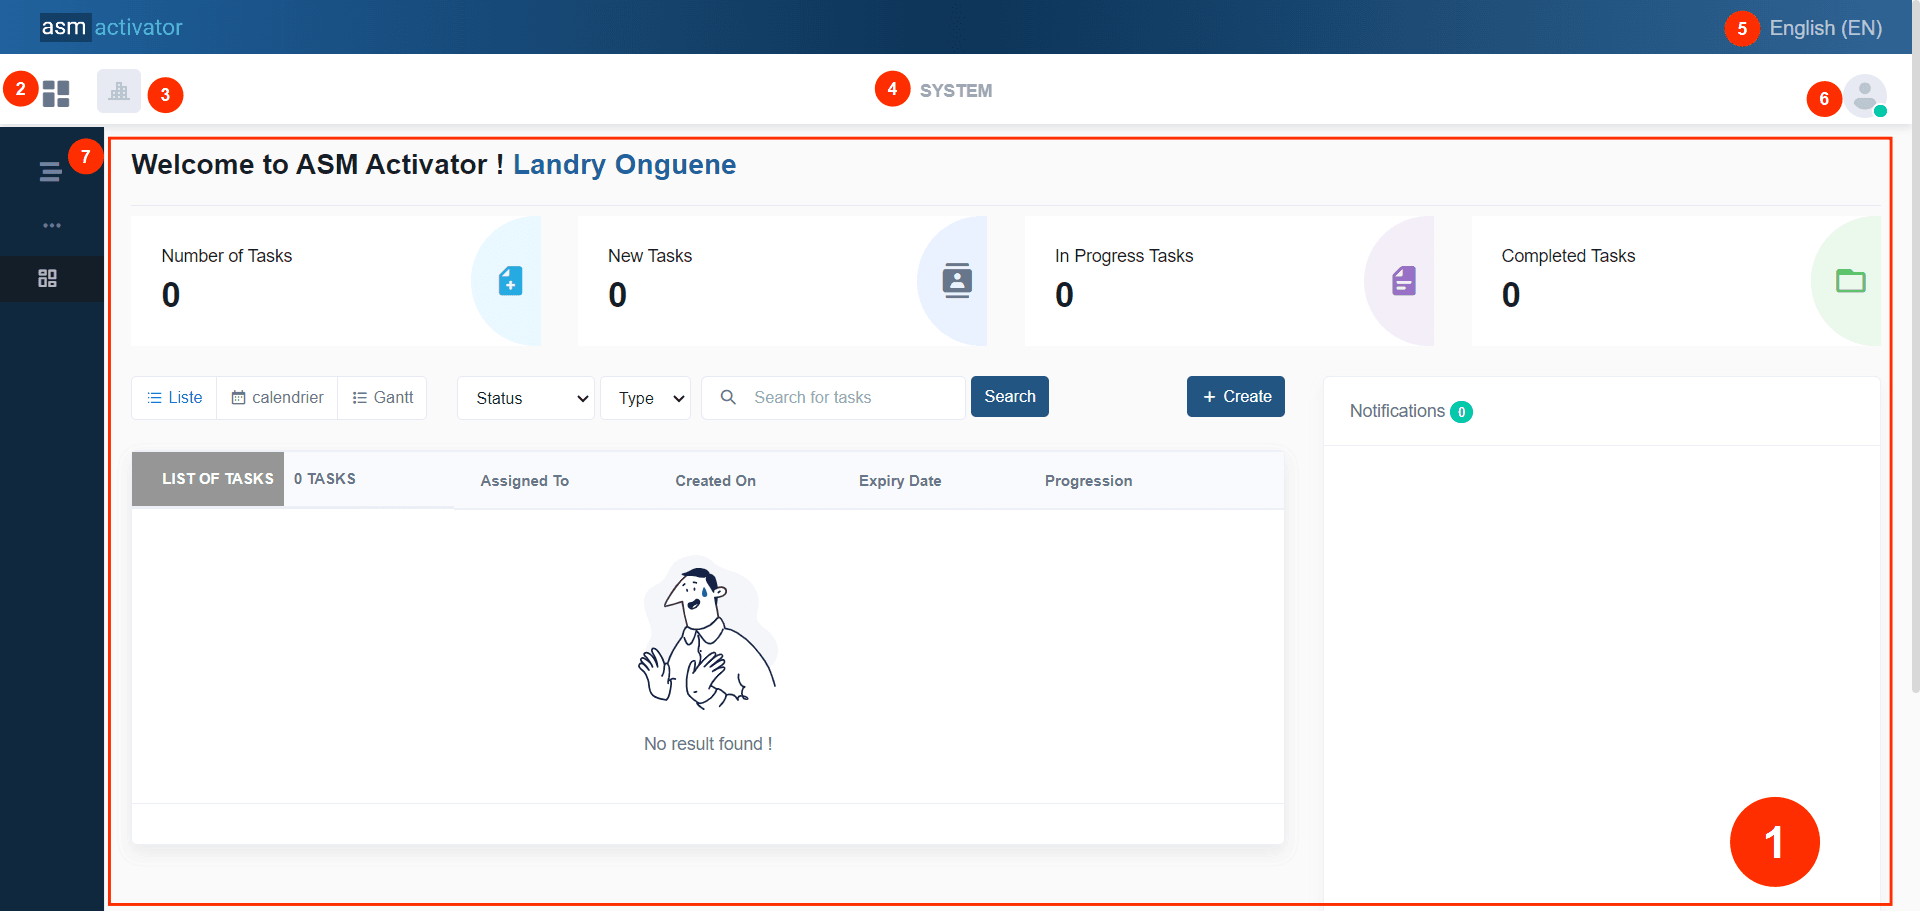
- The main container of the home page: It includes notifications, tasks, and some dashboards. This section is fully configurable by the user. Additionally, it is where the interfaces of modules configured on Activator Admin are displayed.
- Change Modules Button: Clicking here will display a popup containing the list of modules for this tenant. 🚨NB: The modules listed are also dependent on your privileges. See access management in the components [link] for more details
- Tenant Logo: At this level, the logo of the tenant you are connected to is displayed.
💡Tip: If you are associated with multiple tenants, clicking on it will allow you to select and connect to another tenant. For more details, click here [link]. - Tenant Name: At this level, the name of the tenant you are connected to is displayed.
💡Tip: If you are associated with multiple tenants, clicking on it will allow you to select and connect to another tenant. For more details, click here [link]. - Change Language Dropdown: Use this dropdown to select the display language. Currently, English and French are supported, with English as the default language.
- User profile picture: Clicking on it opens the user menu. For more details, go to [link: Manage My Account].
- Sidebar Menu: Here you will find all the different menus of the current active module. This menu will naturally change depending on the selected module.🚨NB: It is also important to note that some menus will be visible or not depending on your privileges and the configuration implemented on them. See menu management [link] for more details.
👍 Now that we've covered the client portal in detail, let's shift our focus to the admin portal.
Admin Portal
Open https://v2_admin_dev.asmlogic.com, you will be redirected to the login page (if you are not authenticated yet).
✋Caution
you can try this documentation with any environnements, but its recommended to use the dev environnement
- Change Language Dropdown: Use this dropdown to select the display language. Currently, English and French are supported, with English as the default language.
- Login Form: This is where users input their credentials: email and password.
- Login Button: Click this button after entering your credentials (email and password) to log in to the system..
- Password Reset Button: Use this button if you have forgotten your password and need to reset it. If you need more information about this functionality, click here
⛳Let's click on the login button and access the Activator homepage.
🗒️NB
If you are associated with more than one tenant, you will see this page (image below) where you should choose the tenant you want to work with. Otherwise, if you are associated with only one tenant, Activator will redirect you directly to the home page.
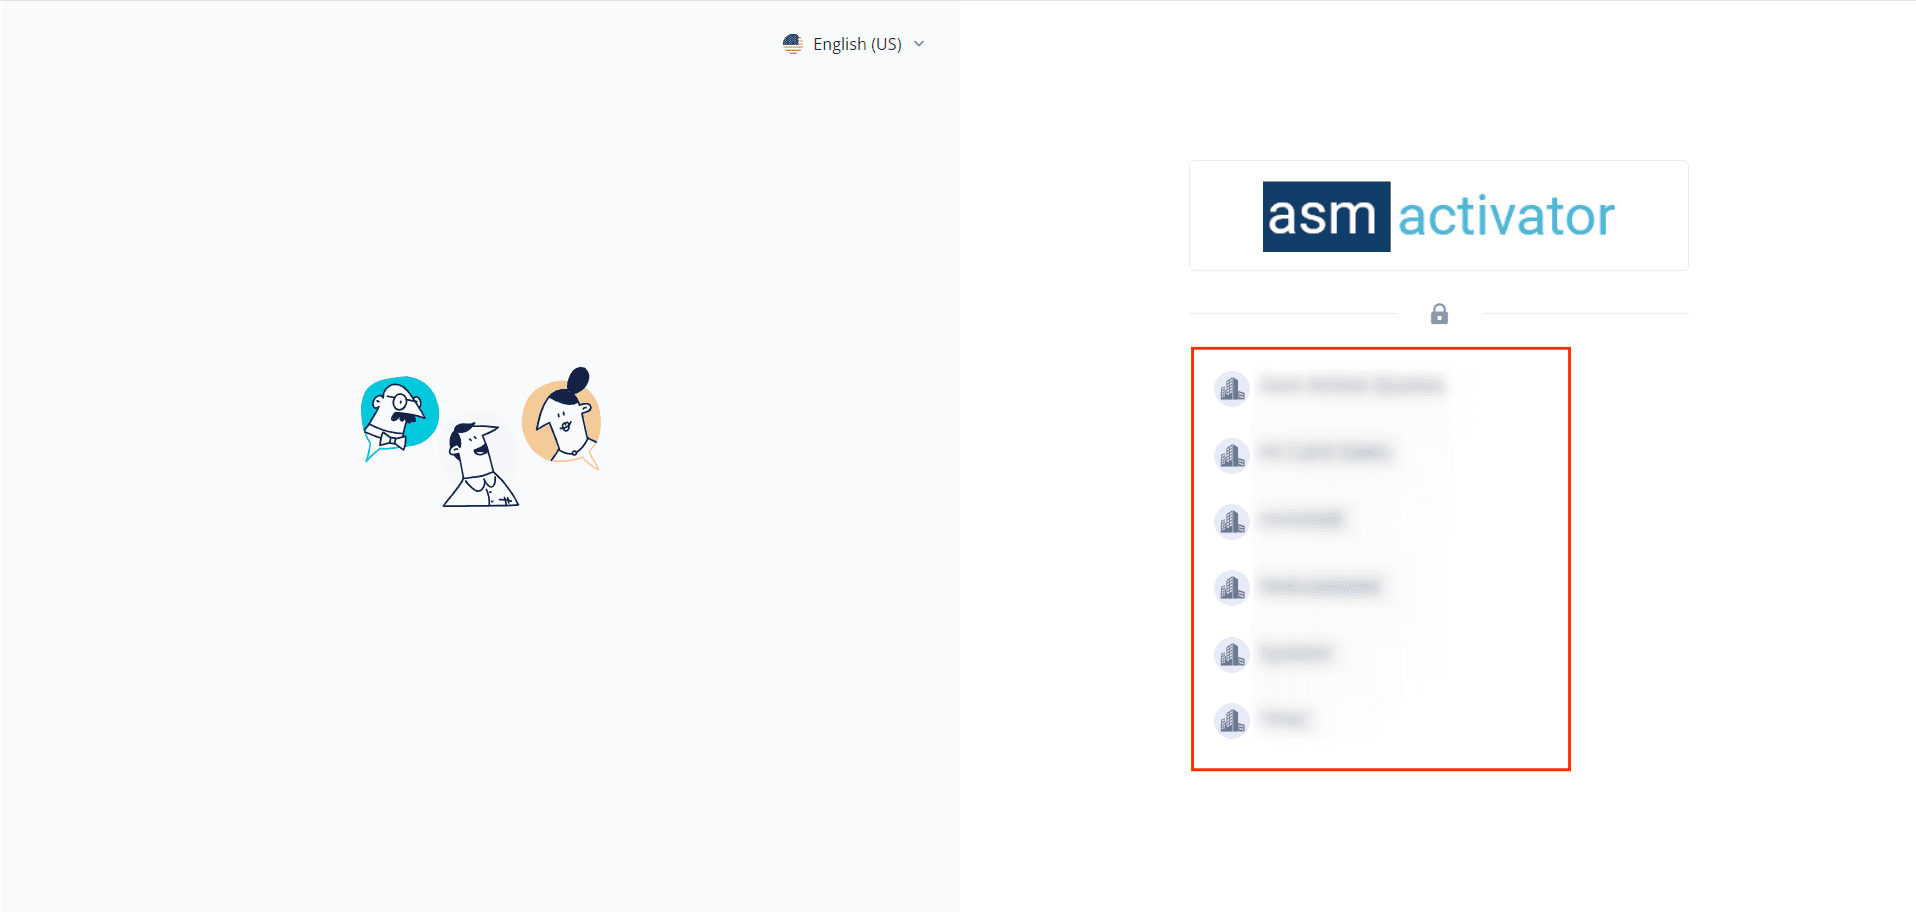
Here is how the user interface looks on the Activator Admin home page (after selecting a tenant for those with more than one 😎).
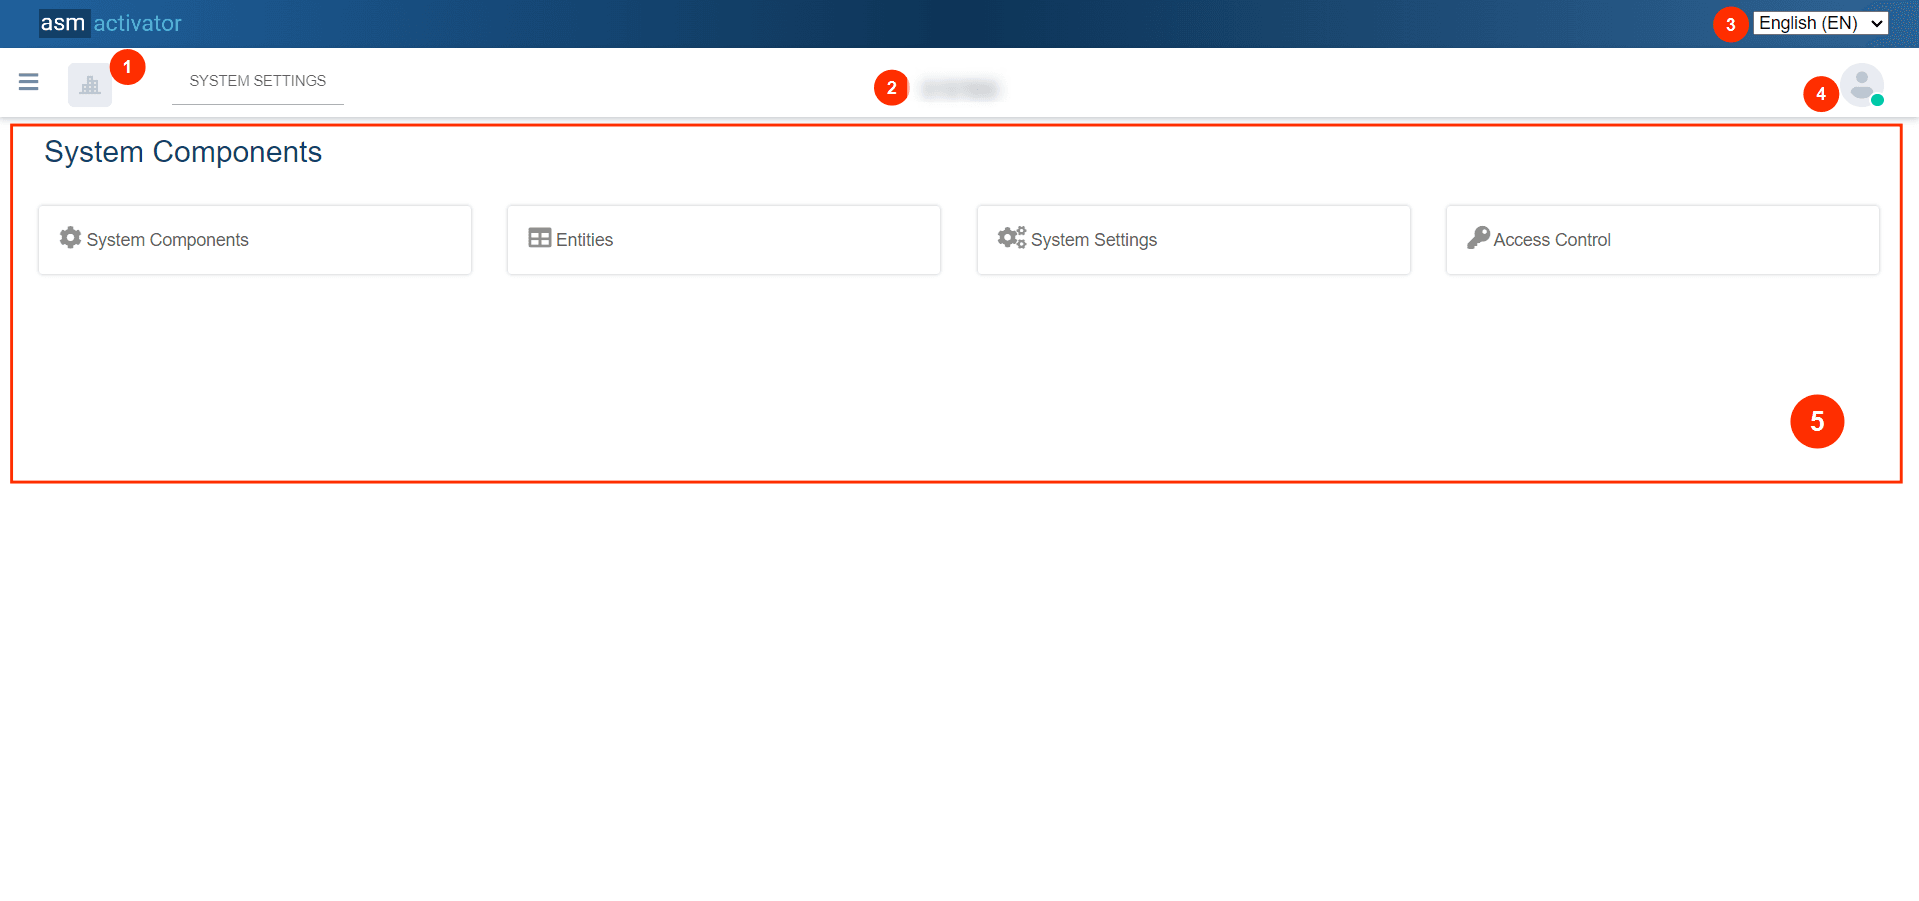
- Tenant Logo: At this level, the logo of the tenant you are connected to is displayed.
💡Tip: By clicking it, you can manage the current tenant, or find, select and connect to another tenant (if you are associated with multiple tenants). For more details, click here [link]. - Tenant Name: At this level, the name of the tenant you are connected to is displayed.
💡Tip: By clicking it, you can manage the current tenant, or find, select and connect to another tenant (if you are associated with multiple tenants). For more details, click here [link]. - Change Language Dropdown: Use this dropdown to select the display language. Currently, English and French are supported, with English as the default language.
- User profile picture: Clicking on it opens the user menu. For more details, go to [link: Manage My Account].
- System Components: Here, we have the list of major component groups in Activator.
- System Components: Clicking this button will take you to the configuration page for all Activator components, except entities.
- Entities: Clicking this button will take you to the management and configuration page for entities.
- System Settings: Clicking this button will take you to the configuration page for the values of all system setting components.
- Access Control: This is where user management and role assignments to users are handled.
👏Now that you have an account and can successfully log in to the platforms, we encourage you to delve deeper by:
- 👉Exploring the detailed presentation of the different platforms
- 👉Starting to create pages and menus for navigation